TF Anti-sway Bar from LaVerne Downey
was seeking to lessen cornering body roll in the TF and had mentioned it
as one of my future projects in a BBS post. A big thanks to Dan Craig
who offered up a used MGB 5/8" bar and all the fittings including new
urethane eye bushings at no charge. This isn't the first time I have been
given needed parts from fellow MGers and I have done so for others myself.
We are truly a unique generous group. A little cleaning of the bar and some
black paint and she looked like new. When trying to fit the bushing to the
ends of the sway bar, I had no success with hand force, pliers or even a
bench vice. In the end I found that you can place the bushings in by
hand if you place them in boiling water for approximately 10 minutes. Remove
them and quickly force them in by hand. If you don't succeed on the
first try, place them back into the boiling water for another 10 minutes or
so. You must work fast as the urethane will stiffen back up fairly quick
after removal from the water. Be careful, It is boiling water after all!
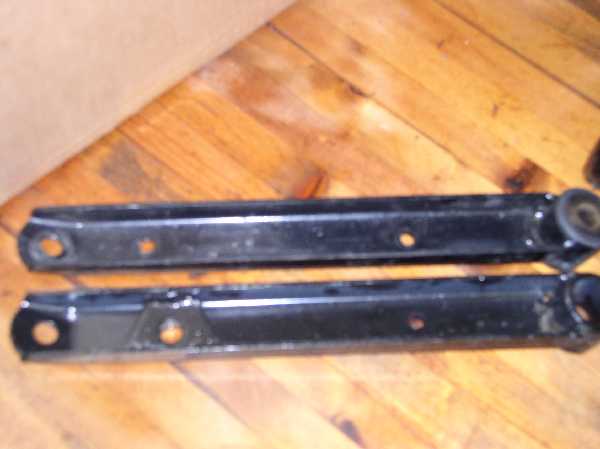
The used lower control arms had some oval issues on the out board end so I
was faced with three choices.
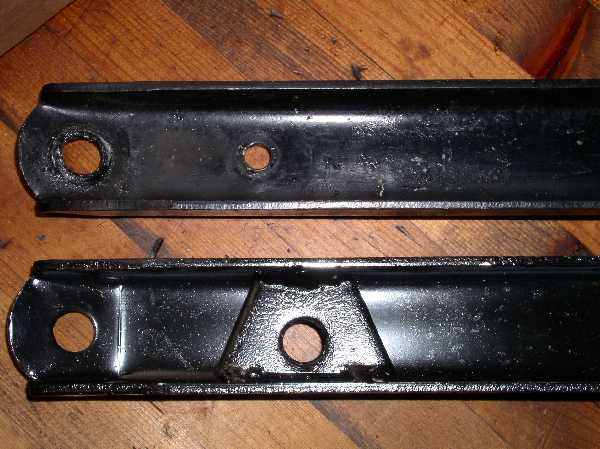
1. Weld around the opening and re drill the hole.
2. Weld in a trapezoid piece into the stock TF arm and drill the hole for
the sway bar.
3. Buy a new set of MGB arms.
In as much as I needed some bits from Moss anyway, I chose to order new arms
and forego the challenge of rebuilding the arms. I also purchased new links
as the rubber in the supplied ones were well aged.
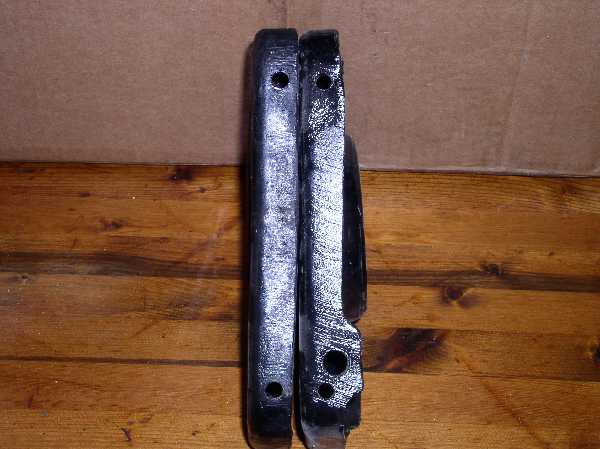
For those not familiar with the MGB arm and spring pan, I have provided a
photo of both along side of the TD/TF arm and pan so you may see the
differences.
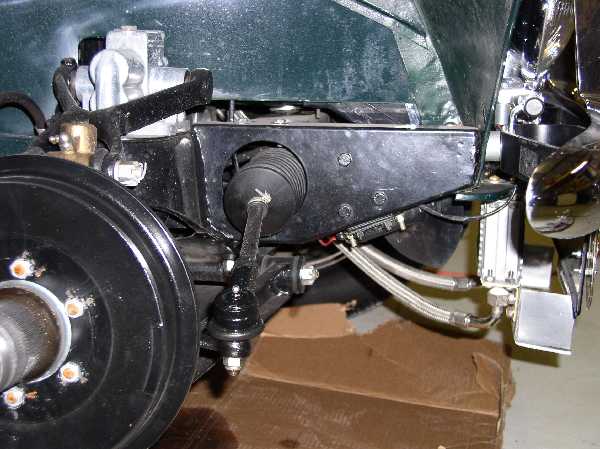
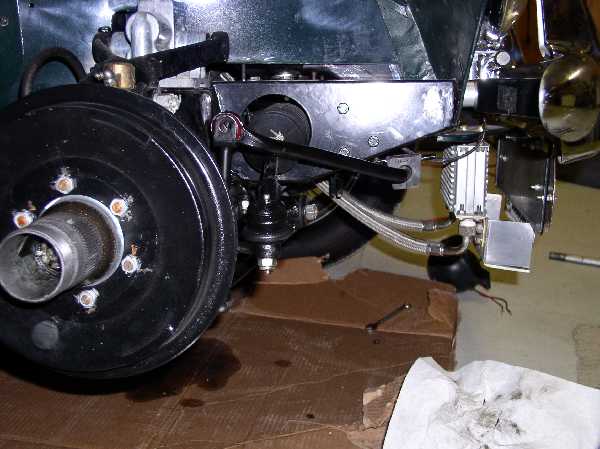
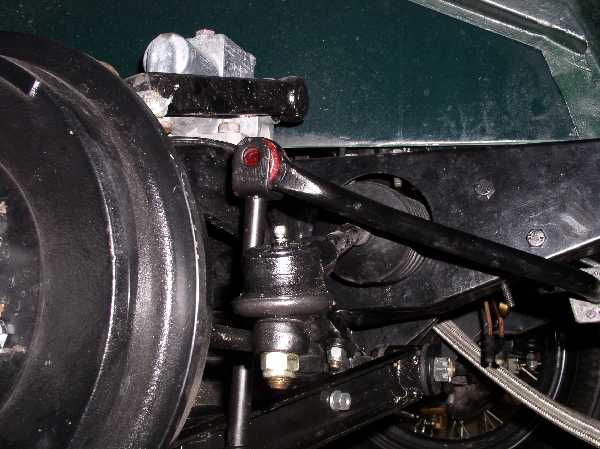
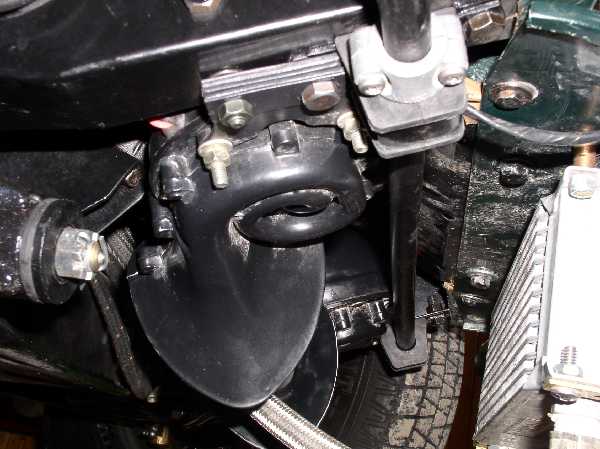
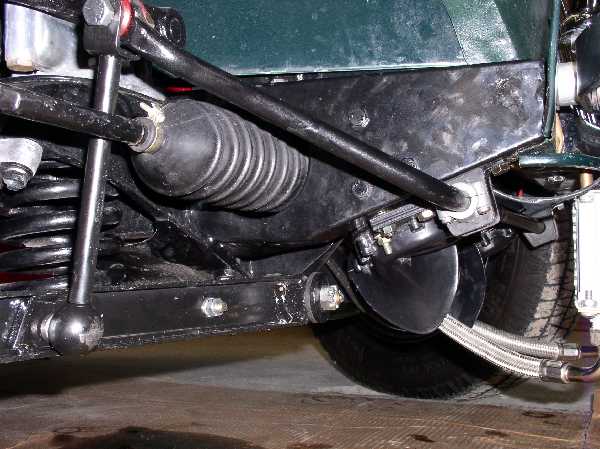
The TF provides some challenges because of the horns being mounted between
the dumb irons. In addition I have mounted an oil cooler under the front
pan. After looking at John Progess' and John James mounting with the
shortened links I decided I would see if the standard "over the tie rod"
method could be accommodated. After removing the horns I found that I could
use the forward horn mounting hole for the rear of the sway bar bracket and
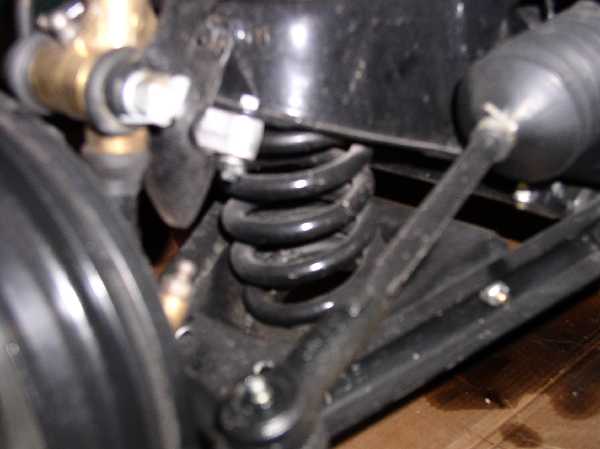
go over the tie rods. This position provides ample clearance for the tie rod
ends in all sprung and un sprung positions as well as clearance from full
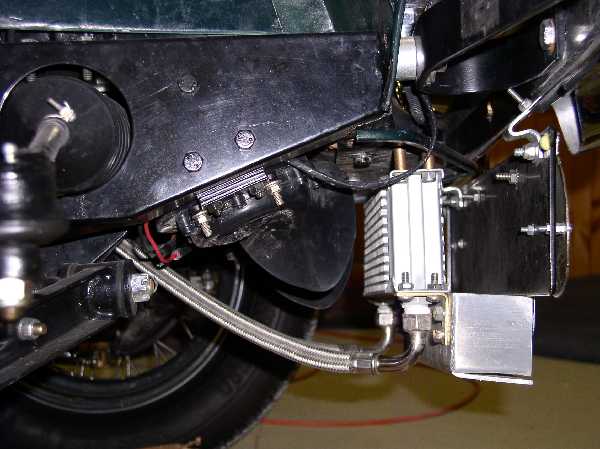
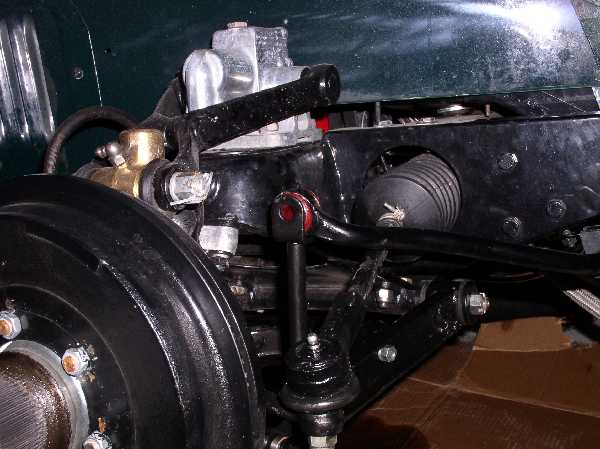
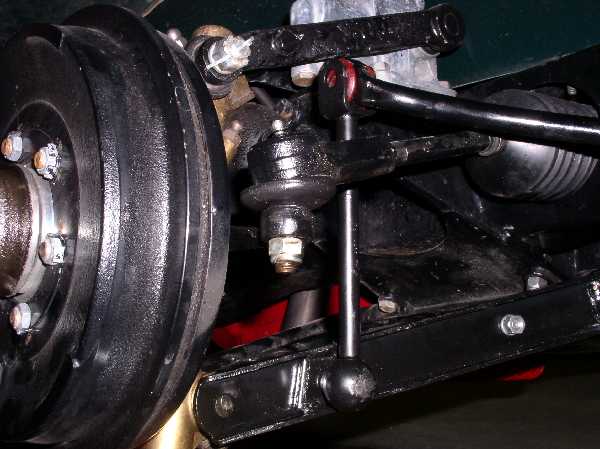
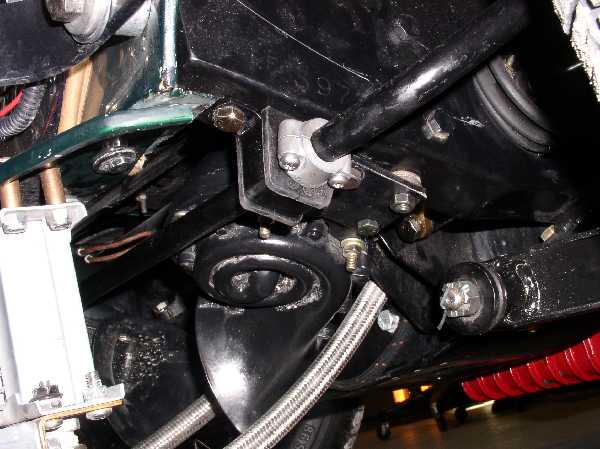
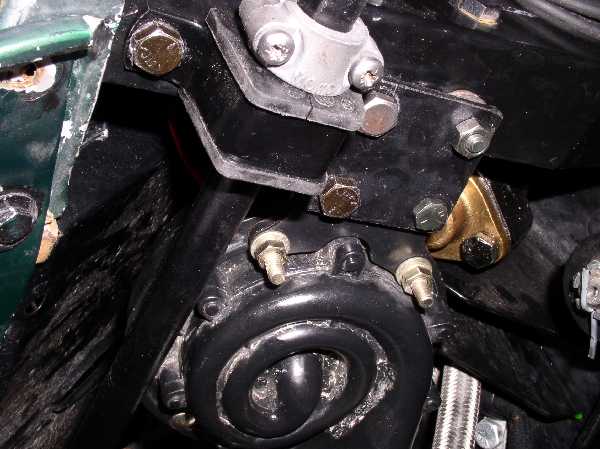
track to track on the steering rack. After mounting the bar the next issues
was placement of the horns. I found that the left horn could be mounted in
its original position by mounting it under the dumb iron. The right hand
side horn had to be moved closer to center because of interference issues
with the brass end of the steering rack. I simply used some 1/4" bar stock
and mounted it to the original dumb bar holes and mounted the horn to the
other end. I also had to add some washers closest to the engine side to
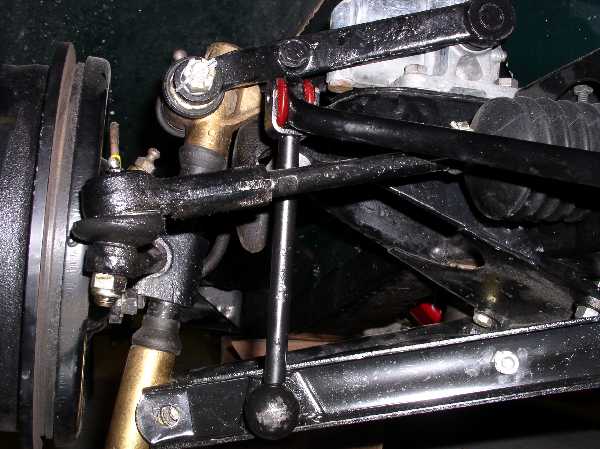
effect a little camber to gain the necessary clearance. Due to the location
of the horns it was necessary to mount the sway bar locating clamps on the
out side of the body bushing brackets. I would suspect that right hand drive
cars would have to reverse the process. The horns set no lower than the sump
and in my case are sheilded by the oil cooler.
A word of caution for TFers that might attempt this installation. My TF had
been "nosed" into a rock in the Colorado river many many years before my
ownership. The dumb irons had been cobbled back together and only one Lucas
horn was on the car under the bonnet TD style when I bought it. I fabricated
some new dumb irons and the horns are a Chinese Moss replacement. This said,
my mounting holes may or may not be in the same location as original and you
may or may not be able to mount your horns as I have done.
*************************************************************************************************
Attached below is the series of images from LaVerne. Email
questions can be sent to LaVerne by clicking
HERE.