Ttalk.info
[ Home ] [Tech Index ] [ Picture This ] [ Autojumble ] [ Car Lists ] [ Search ] [ The53 ] [ FYI ] [ Ttalk ]
The53
SOLD!
This webpage has been created to document some of the story of the salvaging (not restoration) of a 1953 MG TD automobile, Car #TD 23618. The car became lost sometime after 1972 and surfaced thirty years later, in 2002. It came very close to suffering an ignominious end of being parted out when I rescued it in 2005. This page has served a variety of purposes in these past 8 years, documenting points of originality. Please forgive the lack of organization. Bud Krueger, 3/8/2013. BTW, small images with a blue border are thumbnails, just click on them.
The latest: May
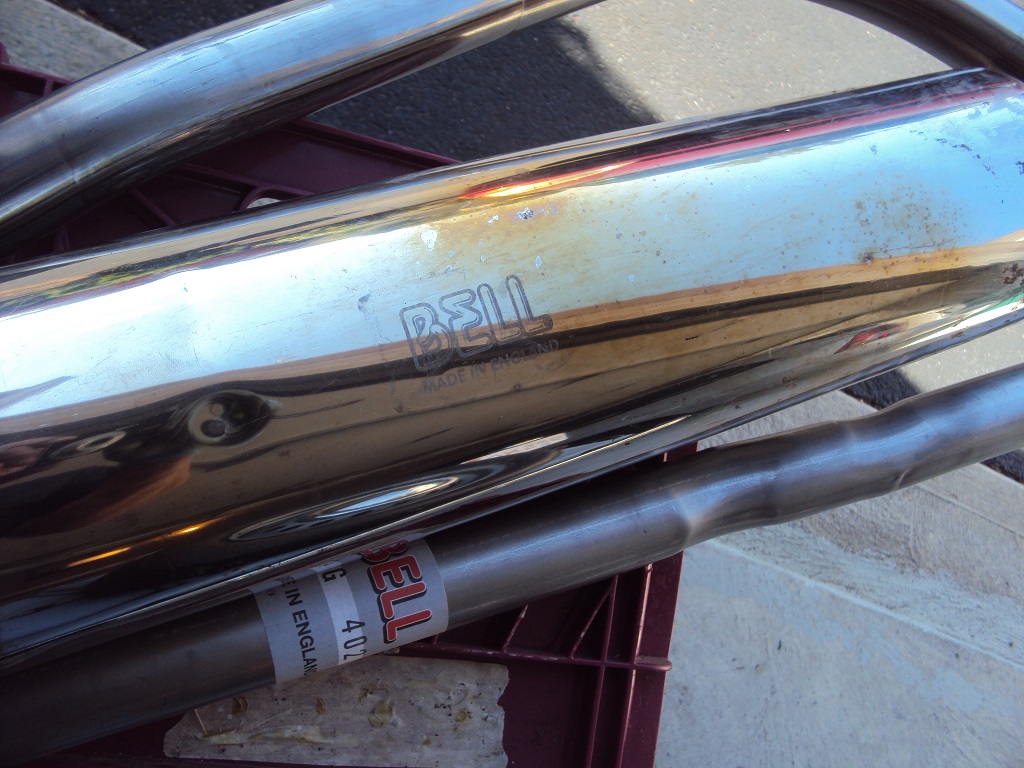
17, 2013 --- The 40 year old exhaust system couldn't handle the stress of modern
time (and hangers). What else would a respectable TD want to breathe
through but a Bell exhaust system. Sounds great!!! (please forgive
the little dent)
The latest: April
12, 2013 --- Finally had a chance to get the53 on the road this week (between
rains). First chance I had to get it up to highway speed. Discovered
that the tachometer is very optimistic, needs a bit of calibration. The
speedometer has the usual +/- 5 mph wobble. Fortunately I had my GPS
running and got the machine up to a true 55 mph. I was absolutely
delighted by the stability. Took my hands off the steering wheel and the53
just kept going where it was pointed. My guess is that the front
suspension and steering were rebuilt about the time that the engine was rebuilt.
I had noticed that the steering boots were solid (after 40 years). Rubber
products were much better in those days. I see no need to do any
rebuilding of the front end. I replaced the front wheel bearings (sealed) a
couple of years ago just as a matter of course.
Engine is very peppy. Now I'm more anxious than ever to get the
carpets installed and the top (hood) installed. Almost finished building
the side curtain box top and door. Sanded the black paint off of the 3-bow
hood frame. Should have the rust sanded off tomorrow and be ready for the
Moss top frame paint. If all goes well I should be installing the top by
Tuesday. Stay tuned. Bud
(These two images are thumbnails, click to enlarge.)
It has been
topped:
Or, should I say,
hooded: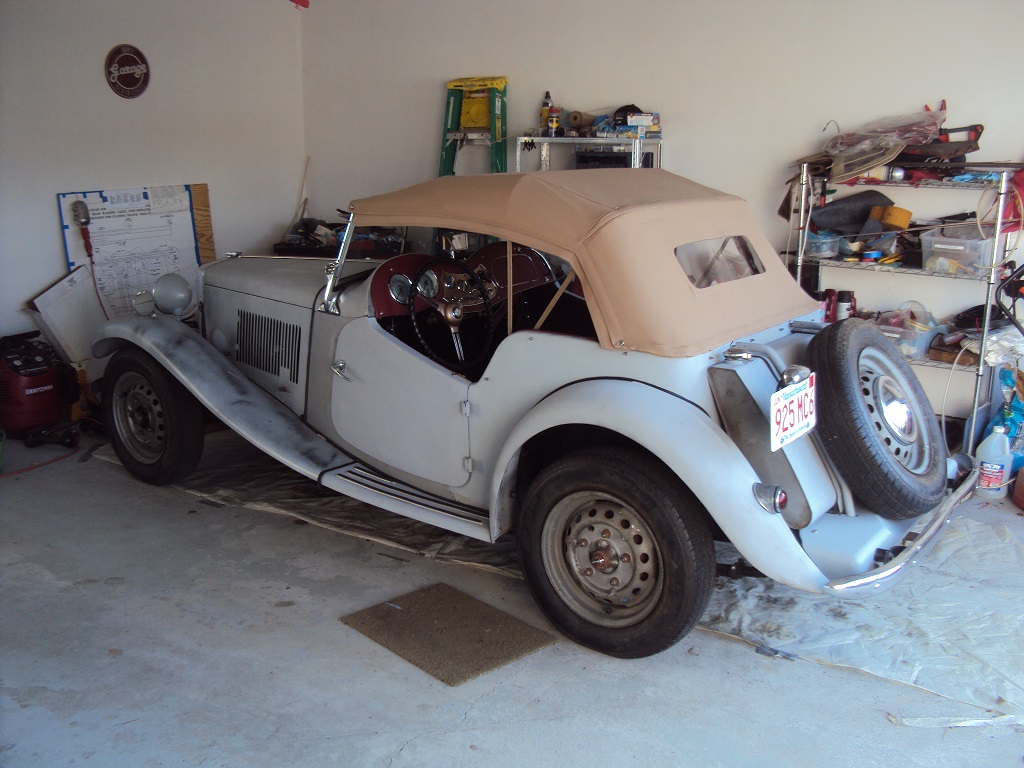
Click here for images taken April 7, 2013
Click here for the story of the engine.
Click here for the story of the gearbox.
Click Here for Toeboard images
10/20/11 Update -- Where was
I? The engine runs fine. Gobs of oil pressure. No ugly noises.
Now the bad news - the radiator leaks. Took it to a repair shop to have it
repaired. Nope! There is too much corrosion in the tubes to the
point where they won't take solder. Estimate to recore the radiator is
$460.
(3/8/13 --Strange thing happened - after soldering up one leaking tube, the leak
went away.)
In the past month I have rebuilt the brakes by saving all of the wheel cylinders
using the grease gun adapter. The brake linings are very thick, but are
glazed. judicious use of sandpaper managed to remove the glaze. The
lining material is gray. I suspect that it might be asbestos, considering
its age.
Replaced the front wheel bearings with new, sealed
bearings. No need for seals.
In July I purchased a new master cylinder through eBay.
Once I had the brakes reinstalled, including new brake lines, I started bleeding
the brakes with the help of Paul Hinchcliffe. Something just didn't feel
right. After adjusting the brakes I gave the pedal a good push to see how
solid it was. It wasn't! Rigged up a couple of plugs for the ports
of the 3-way just after the m/c. Couldn't get pressure. Bubble,
bubble, toil and trouble. The master cylinder wouldn't bleed.
Contacted the vendor and he agreed to honor the warranty. Sent it off to
him. In the meantime I decided to make a go at rebuilding the m/c that
came with the53.
I had already cleaned it and let it soak in deruster. Bought a m/c
rebuilding kit from Abingdon Spares. Gave the bore a good workout with a
cylinder hone and put it together today. After a crazy time trying to
identify the parts and their location I managed to get it assembled.
Reinstalled it in the frame of the53 and bled it up to the 3-way (bench bled
it). Hooked it up to the 3-way with the plugs attached to the front and
rear lines. Pushed the pedal and got beautiful resistance. No air.
The warranty replacement should be arriving next week. I'll probably try
to sell it to gain $$$ for the radiator issue.
9/16/11 Update -- Lots of things to catch up. I have essentially reinstalled the engine and its ancillaries. Today was a very significant day in the rebirth of 'the53'. --- There is oil pressure!!! Tomorrow I hope to fill the radiator and hope there are no leaks. (There weren't) The carburetors have been installed and I think I can jury rig a fuel source for the fuel pump. If all goes well, I'll be back tomorrow night to tell about the sound of the engine.
9/3/11 Update -- Installed new front engine mount. The old one was mushy. The Moss mount has 10mm-1.25 threads. Took the water pump apart and cleaned it. I'll hope that it doesn't leak when the time comes. (It didn't) It's an OEM type with the pulley located via woodruff key and has grease fitting. Drive screws for engine ID plate arrived yesterday. Fits great. Will send the bulk of the extras to Abingdon Spares.
8/27/11 Update
Today I reintroduced the engine and gearbox and reinstalled them into the frame.
Reattached the towbar and towed the frame to our house. It will now share
one of of the two garage spaces while I put this thing back together. One
of the catastrophes was the day before when I attempted to reinstall the engine
ID plate. Lined up the two brass pieces and inserted the drive screw.
Started the drive screw into the hole in the block and gave it a whack with a
hammer. Crunch! The head of the drive screw shattered.
Couldn't pull the broken piece out. Fortunately, the engine was
still attached to the engine stand. This allowed me to turn the engine
over and remove the sump. This allowed me to drive the broken drive screw
out. Neither Moss nor Abingdon Spares had replacement drive screws.
Only local option was to try a split rivet. Unacceptable. Decided to
reinstall the sump and find a drive screw.
At any rate, the frame is now here in my garage at home
rather than being 2+ miles away. Stay tuned.
7/30/11 Update Yesterday, July 29 was spent working on the rear brakes in preparation for installing the new master cylinder and forming new brake lines. Hah! the rear wheel cylinders are frozen in place, so they can't readily be removed. Ended up removing the backing plates from both sides of the rear axle. Was interesting to note that the backing plates on both sides were held on by hardware using SAE 9/16 wrenches. Lock nuts were on each side. Ended up taking the backing plates home along with the assortment of brake rebuilding parts from Lazarus' garage.
Today, July 30, was spent
disassembling the rear wheel cylinders. Hooray for Pascal. Had to
use the grease/bolt in the wheel cylinder to force the piston out of the
cylinder. The right side is still in need of the grease job. Looks as if
the cylinders can be honed and rebuilt. I sure hope so.
July 28, 2011 More Updating
In the past month I've decided to
move the53 parts (frame, engine, sheet metal, virtually everything except the
tub) from the garage that I've kept in and put it into one of the garages
attached to the house. Slight problem -- Condo rules prohibit
unlicensed vehicles. Solved that by insuring and registering the car.
I've been working on getting the frame into towable condition. This is
also the best time to sand, scrape, scrub and paint the frame. In
addition, this is the best time to attack the miserable task of rebuilding the
pedal shaft system. I'll put together a separate page on the pedal shaft
operation. The master cylinder was totally full of rusty crud and is not
worth trying to have it sleeved. I was able to buy a new one for $125 thru
eBay. A new set of brake lines has been received from Abingdon Spares.
Hope to have them installed in the next week.
More to come. Stay tuned.
6/7/11 Update time
I guess this is going to become sort of a blog (though I hate the things). A lot has happened and a lot of decisions have been made. I've decided to create a working car out of the53. I will replace all of the wood that needs to be replaced, i.e., about 90% of it. I'll have the metal work media blasted and will cover it with primer. The next owner can decide if he/she wants to return the car to its original Silver Streak Gray color. I'll paint inside surfaces with Rustoleum 7777 to provide protection. I'll also cover the frame and its components with the same Rustoleum 7777. I have rebuilt the engine and gearbox. The car will be a good running, safe TD when I'm finished. I expect to sell it for about $10,000. I'm not convinced that I would recover the costs of exterior painting. I will install a new wiring harness and new brake components. Stay tuned --
3/18/10 -- Update time.
It's been a long time, but let me give you a thumbnail of
what's happened. Significantly, I bit the bullet and did what had to be
done to obtain a Massachusetts title for the53. I've totally rebuilt the
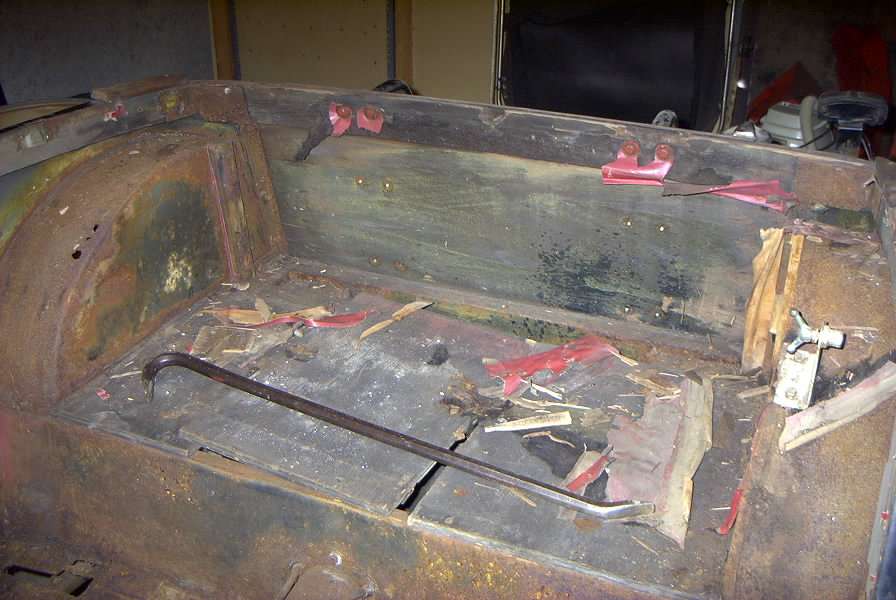
engine and have begun the efforts to rebuild the tub. What a mess that has
turned out to be. I disassembled the body to see how far I would have to
go before meeting solid wood and metal. HA! At the moment I have a large
pile of wood and metal that purports to be a tub in kit form. Today's
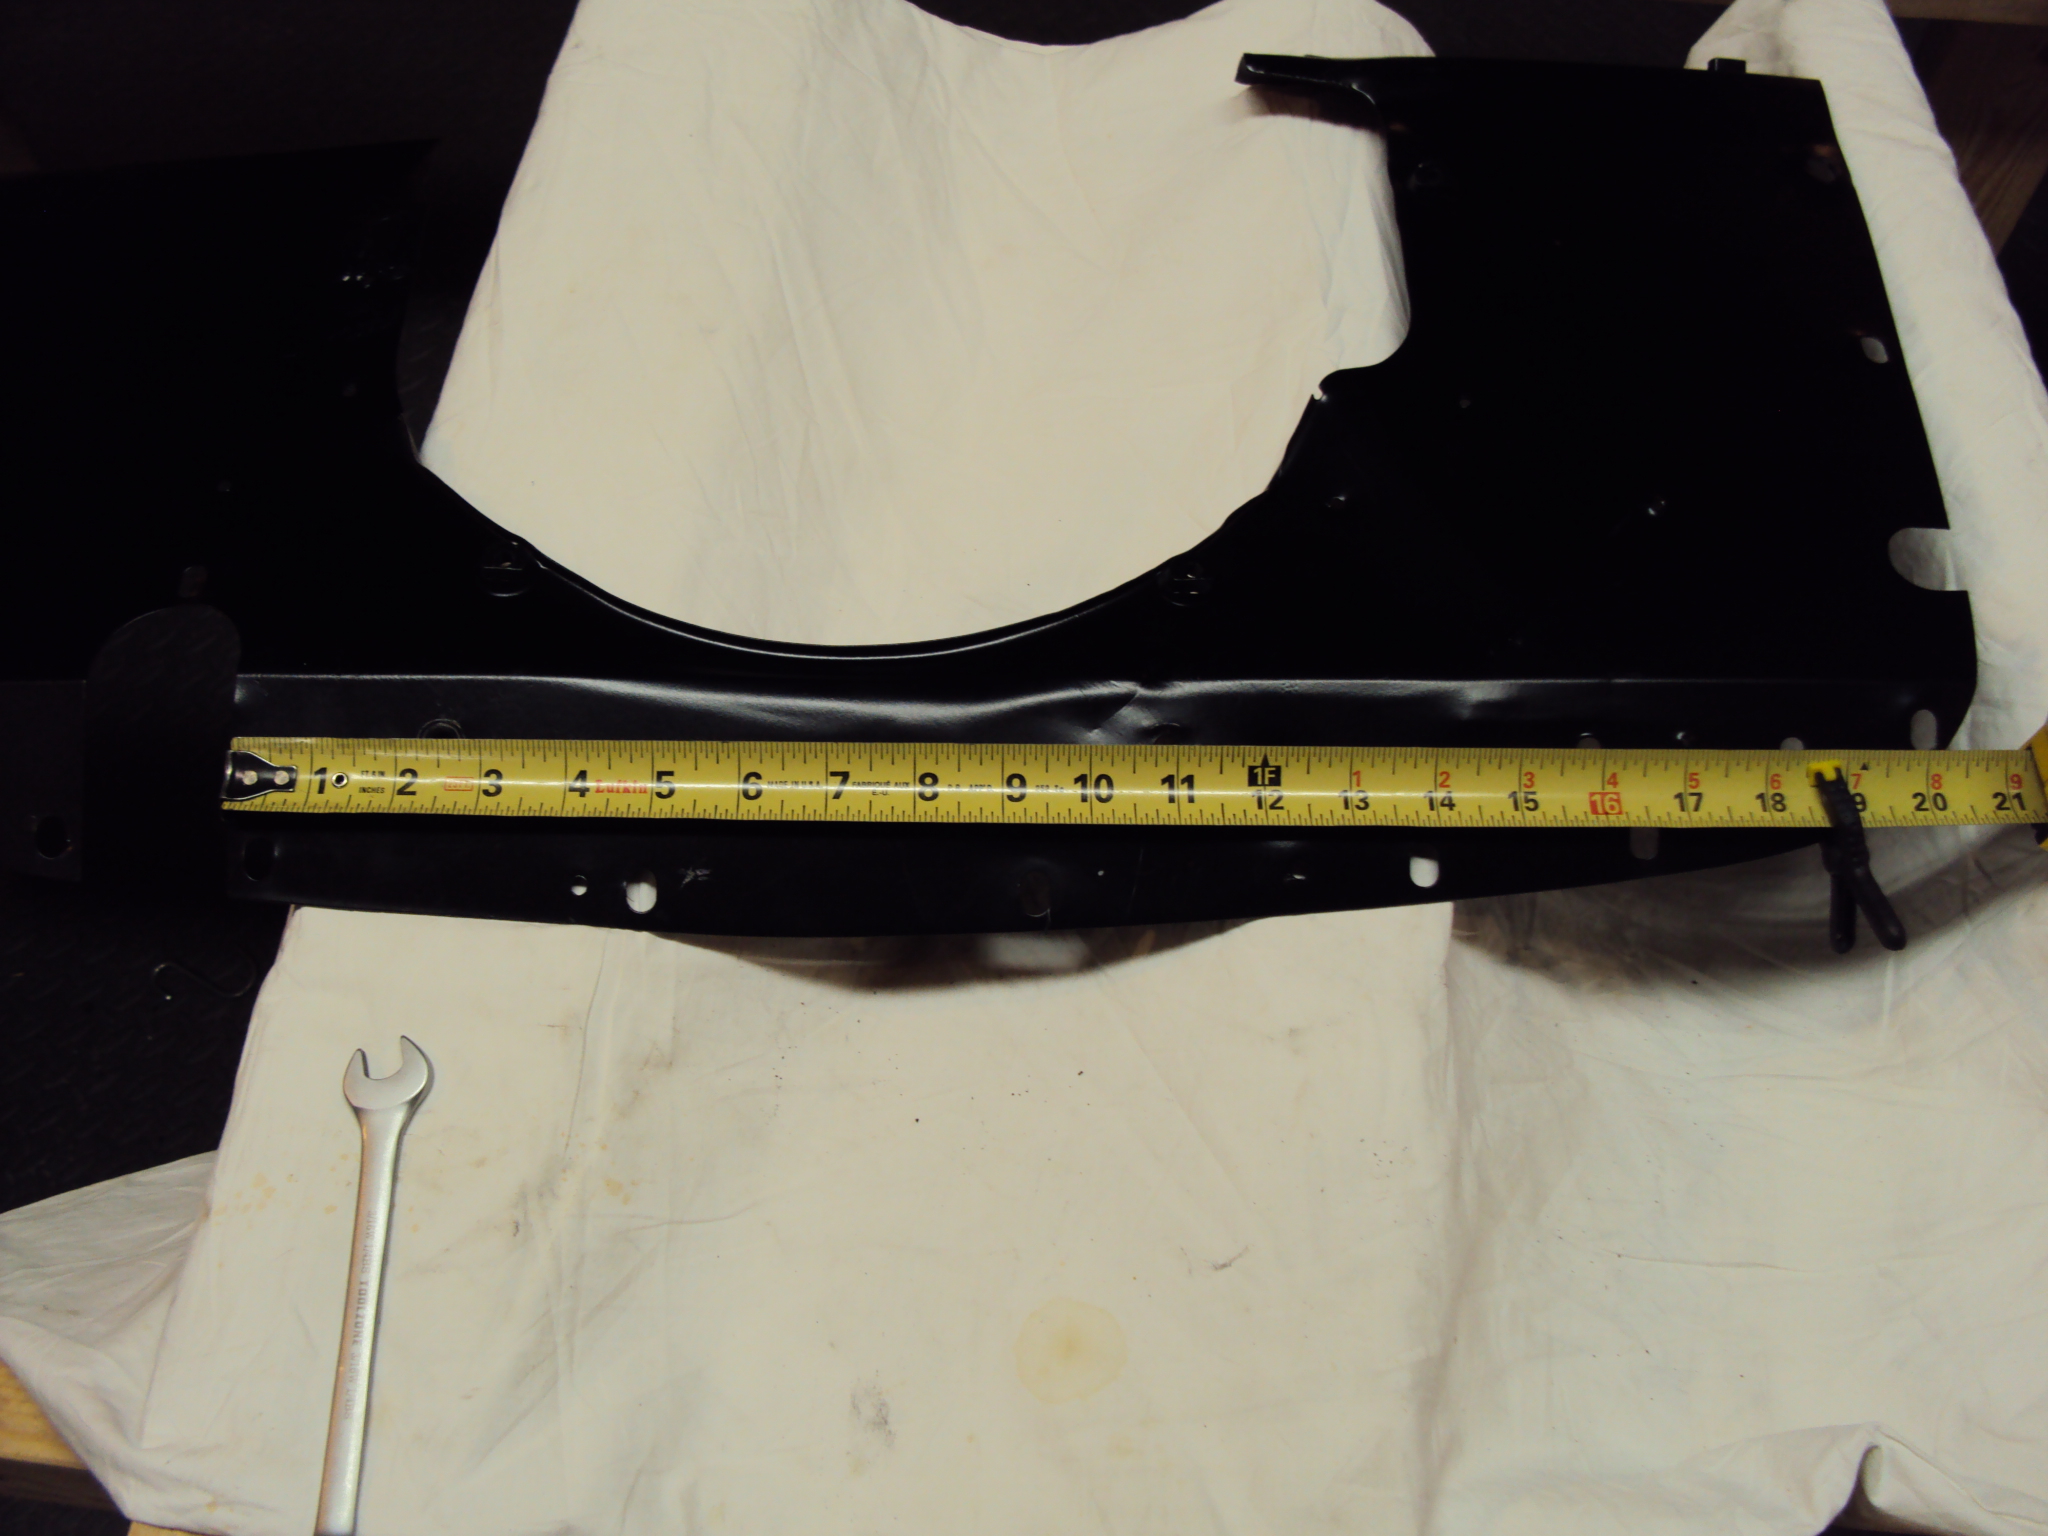
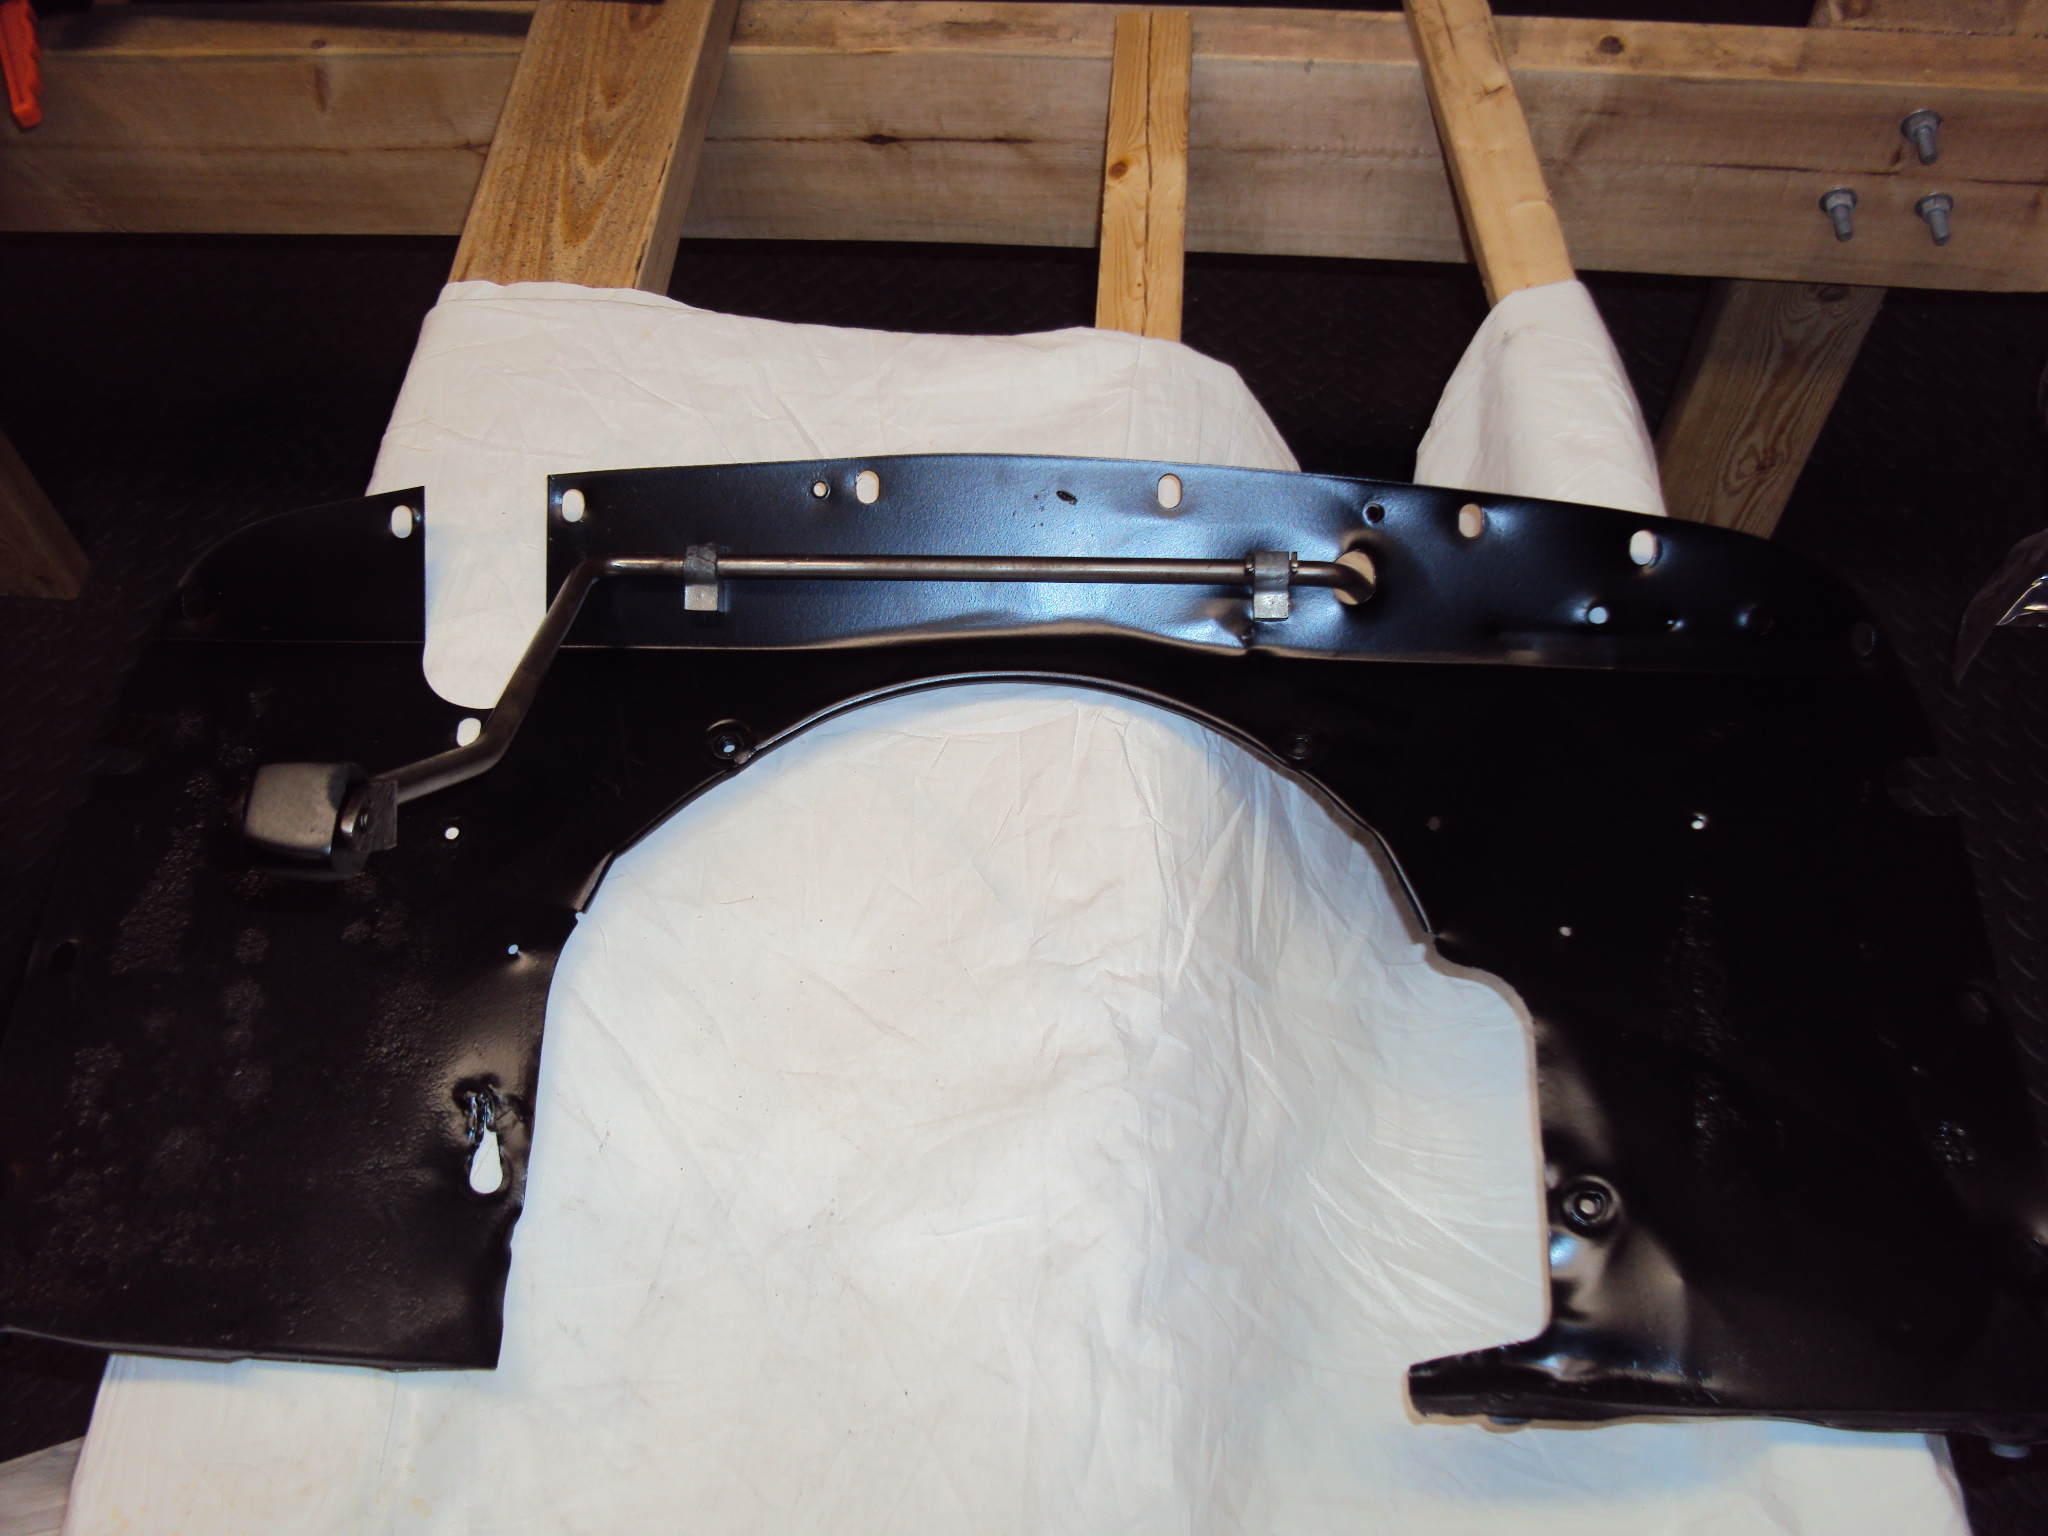
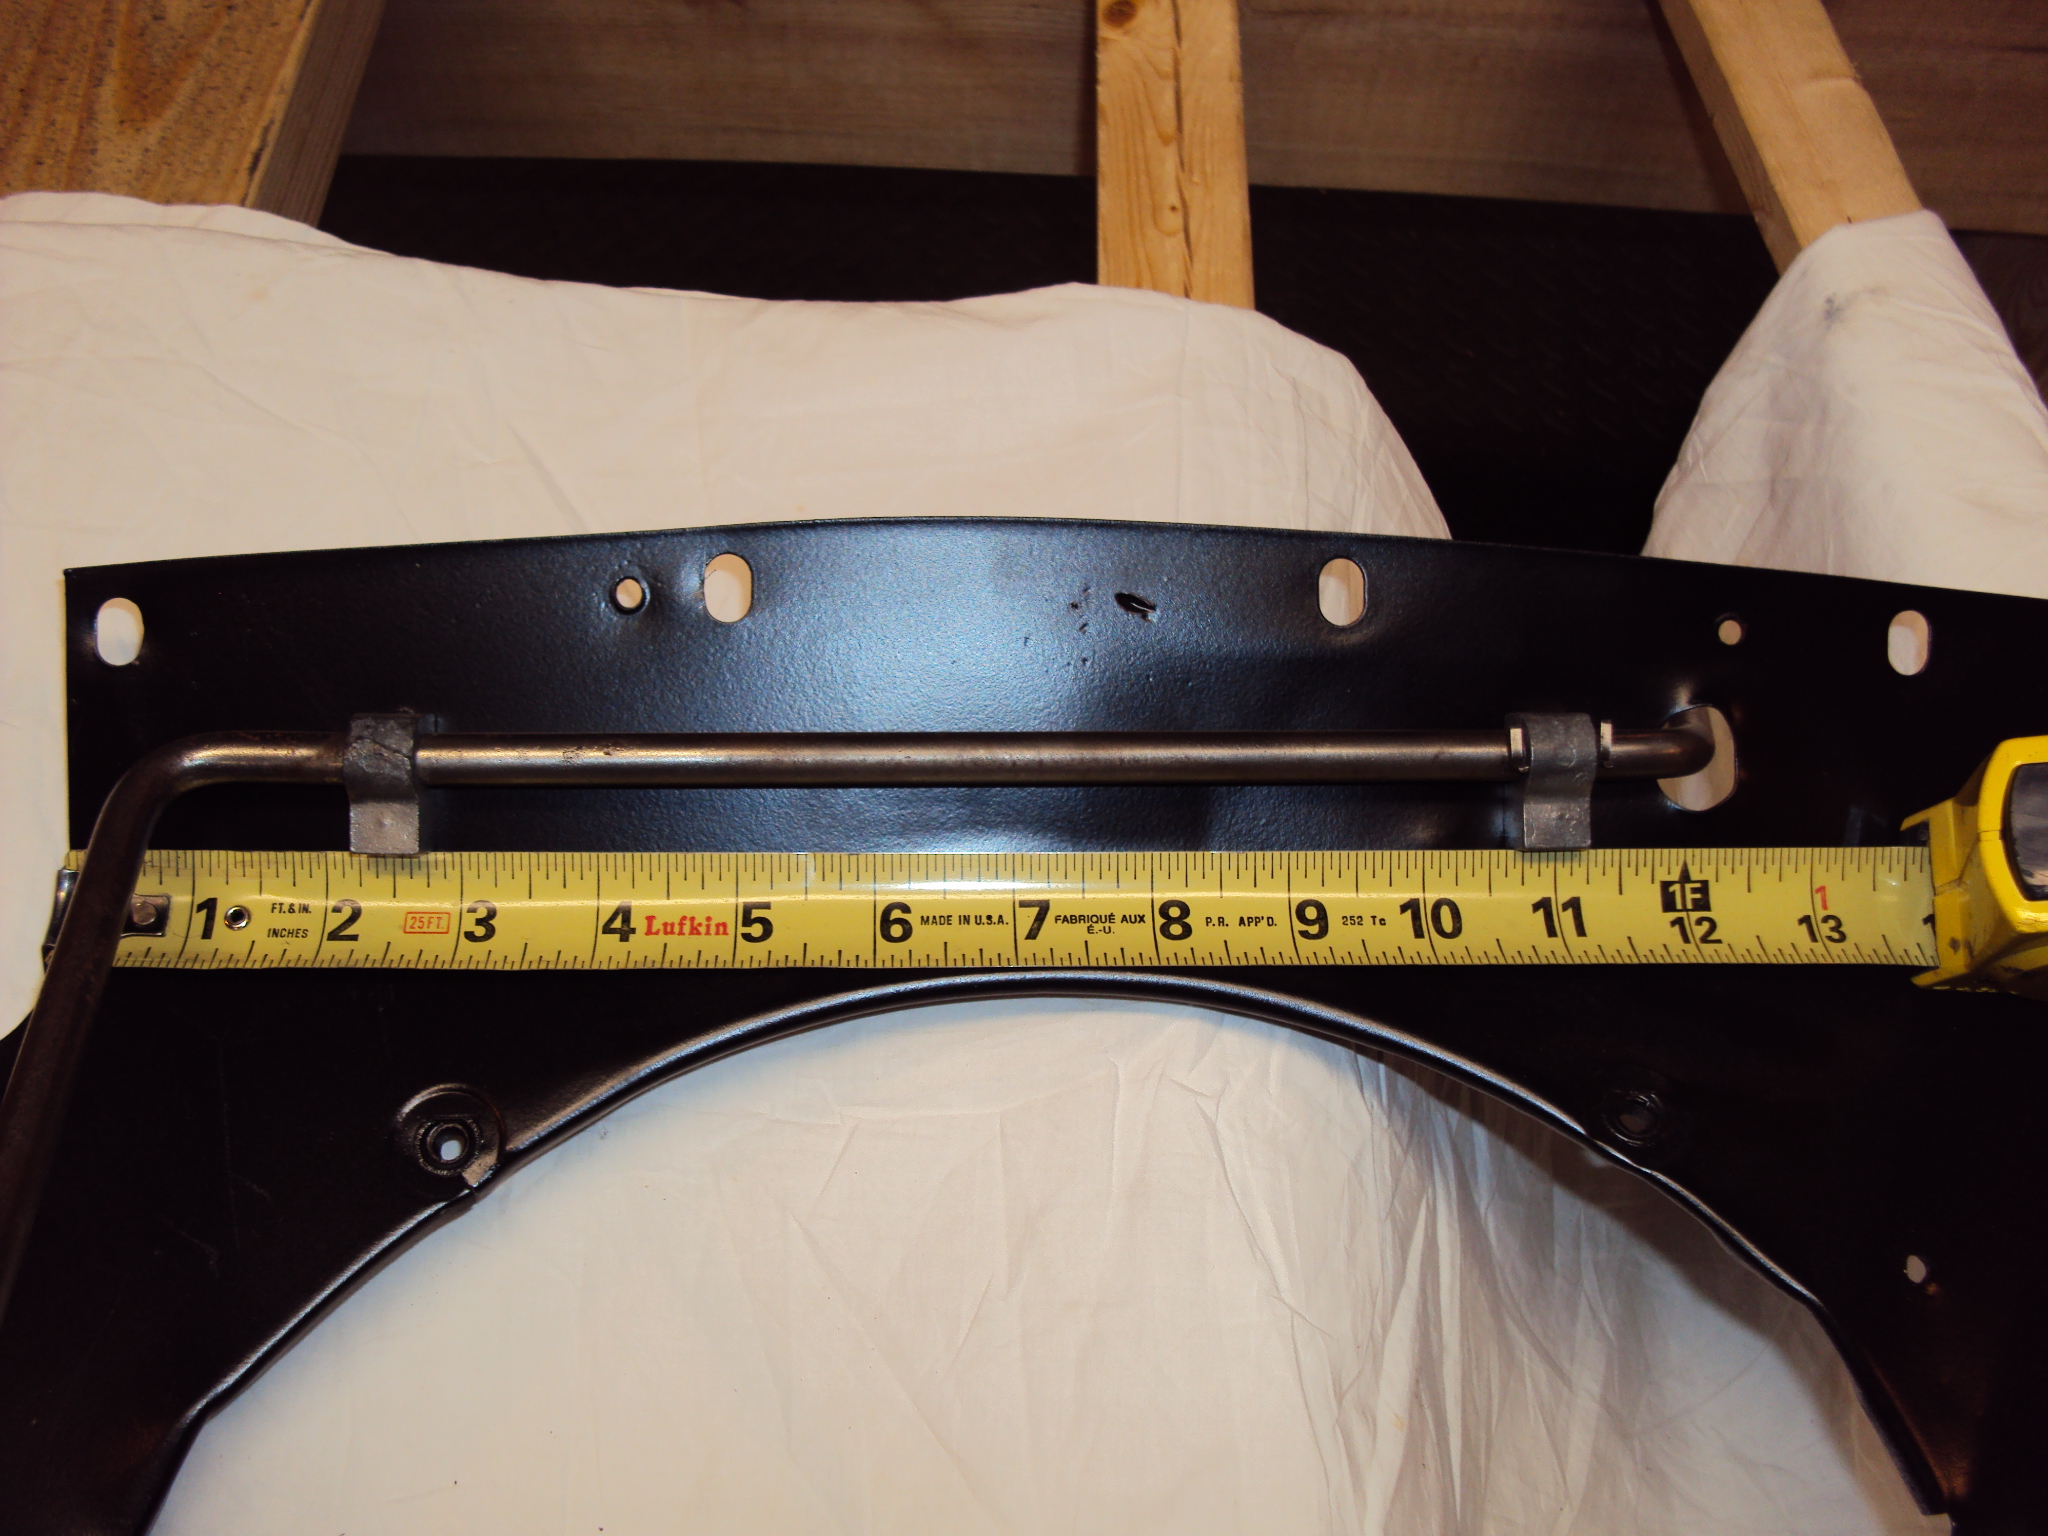
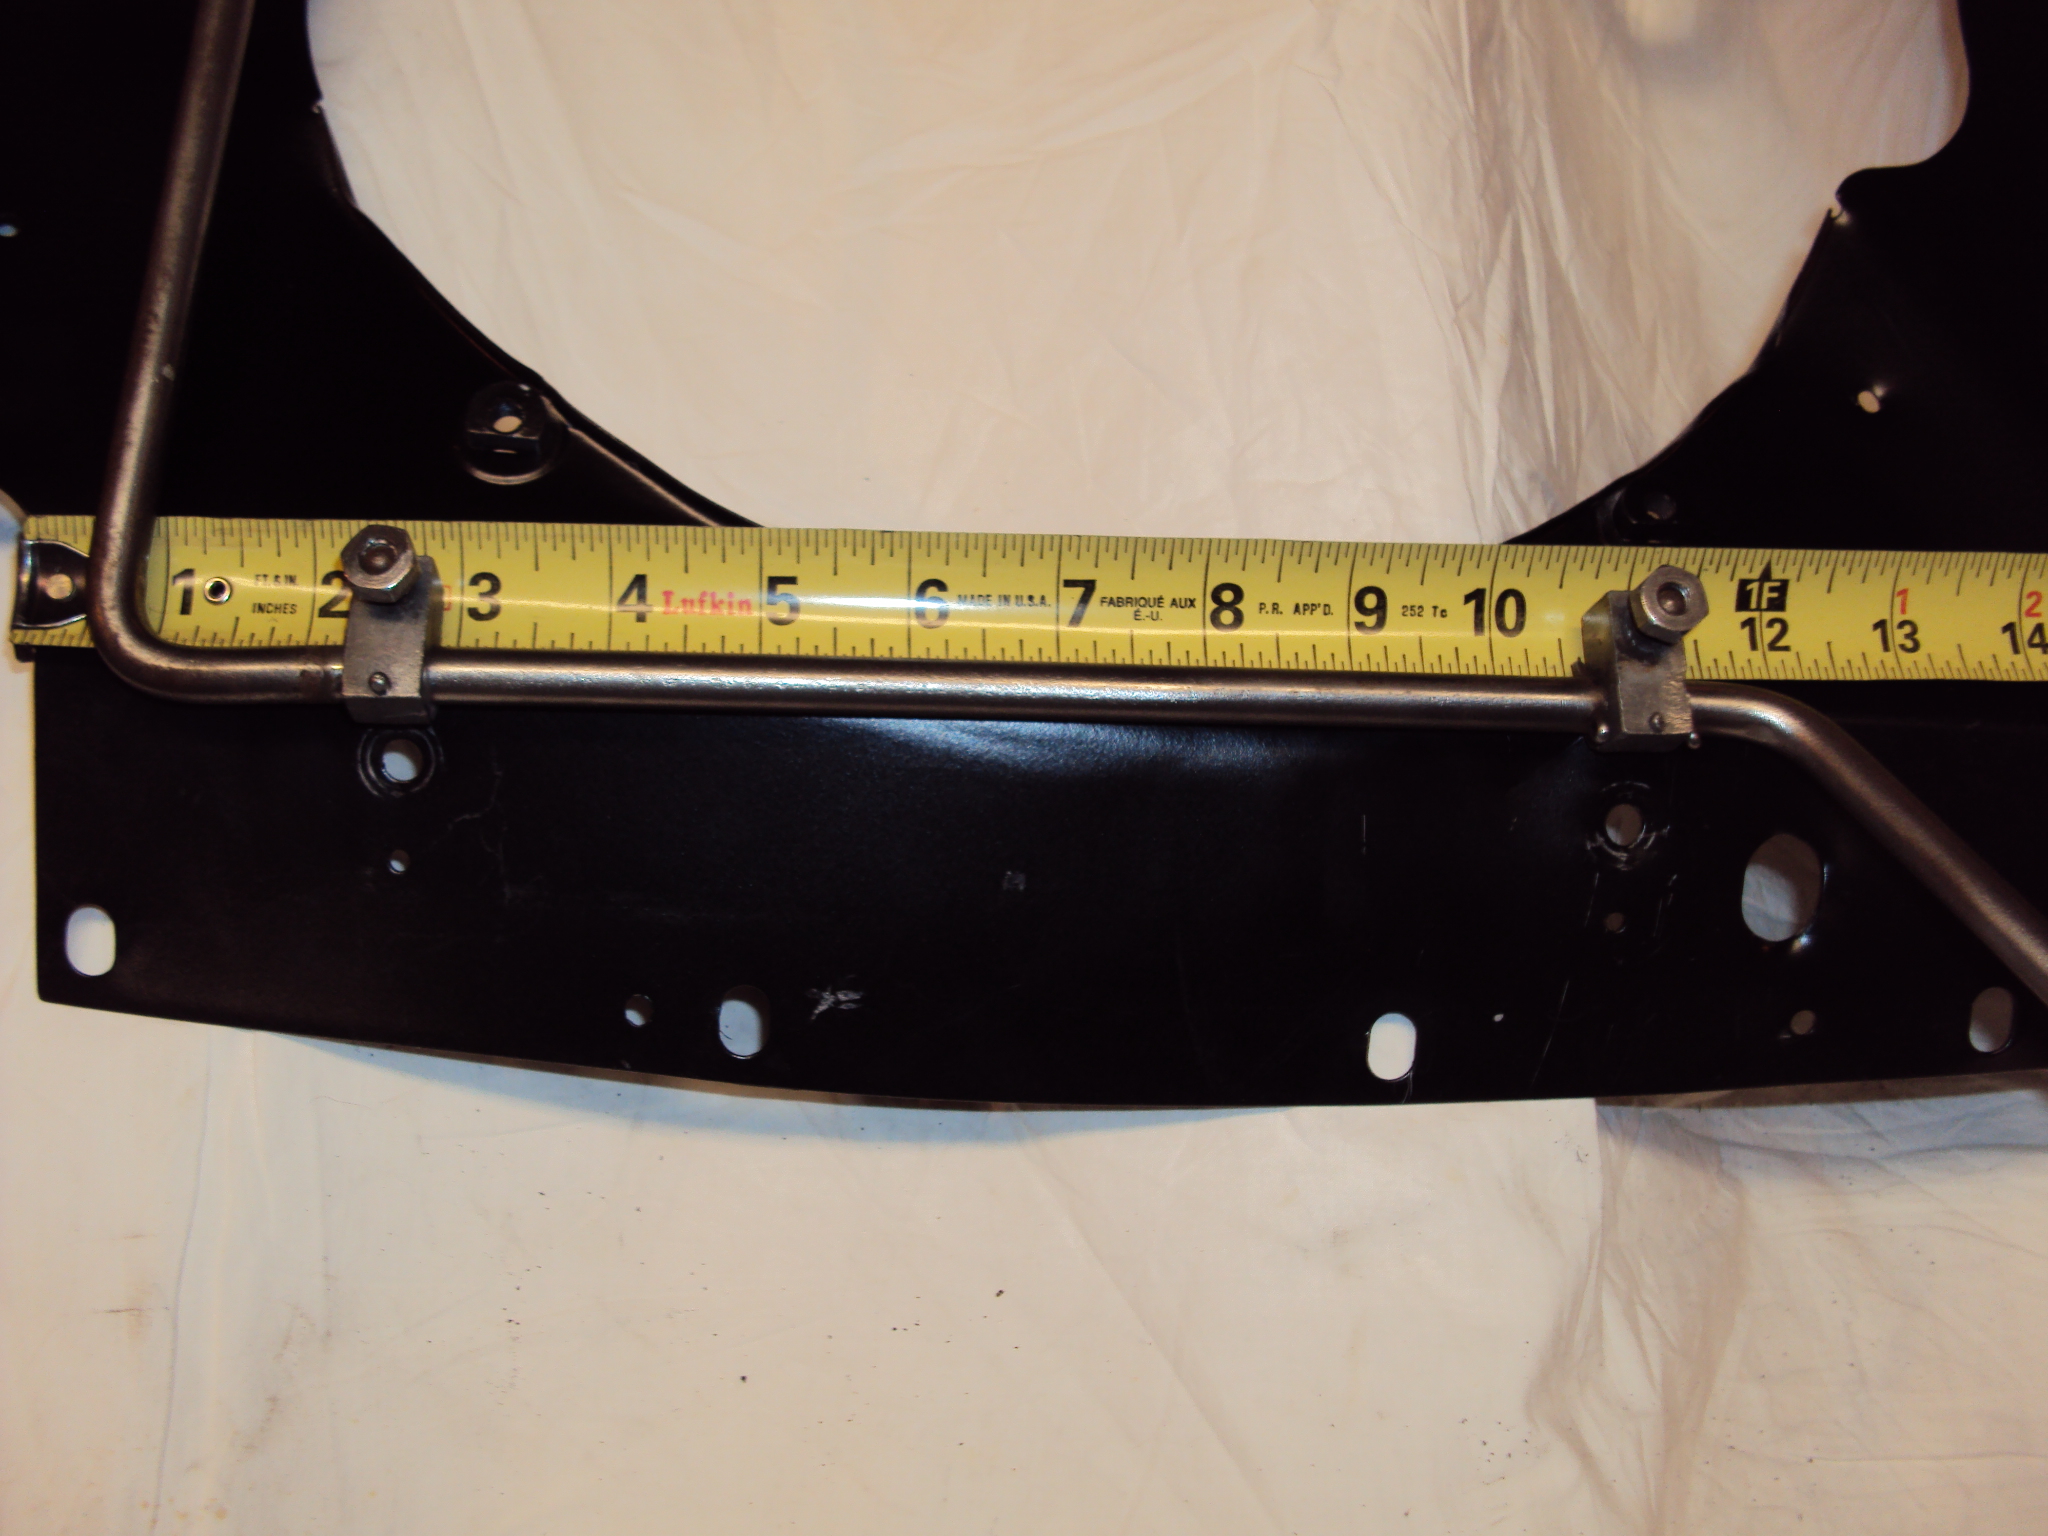
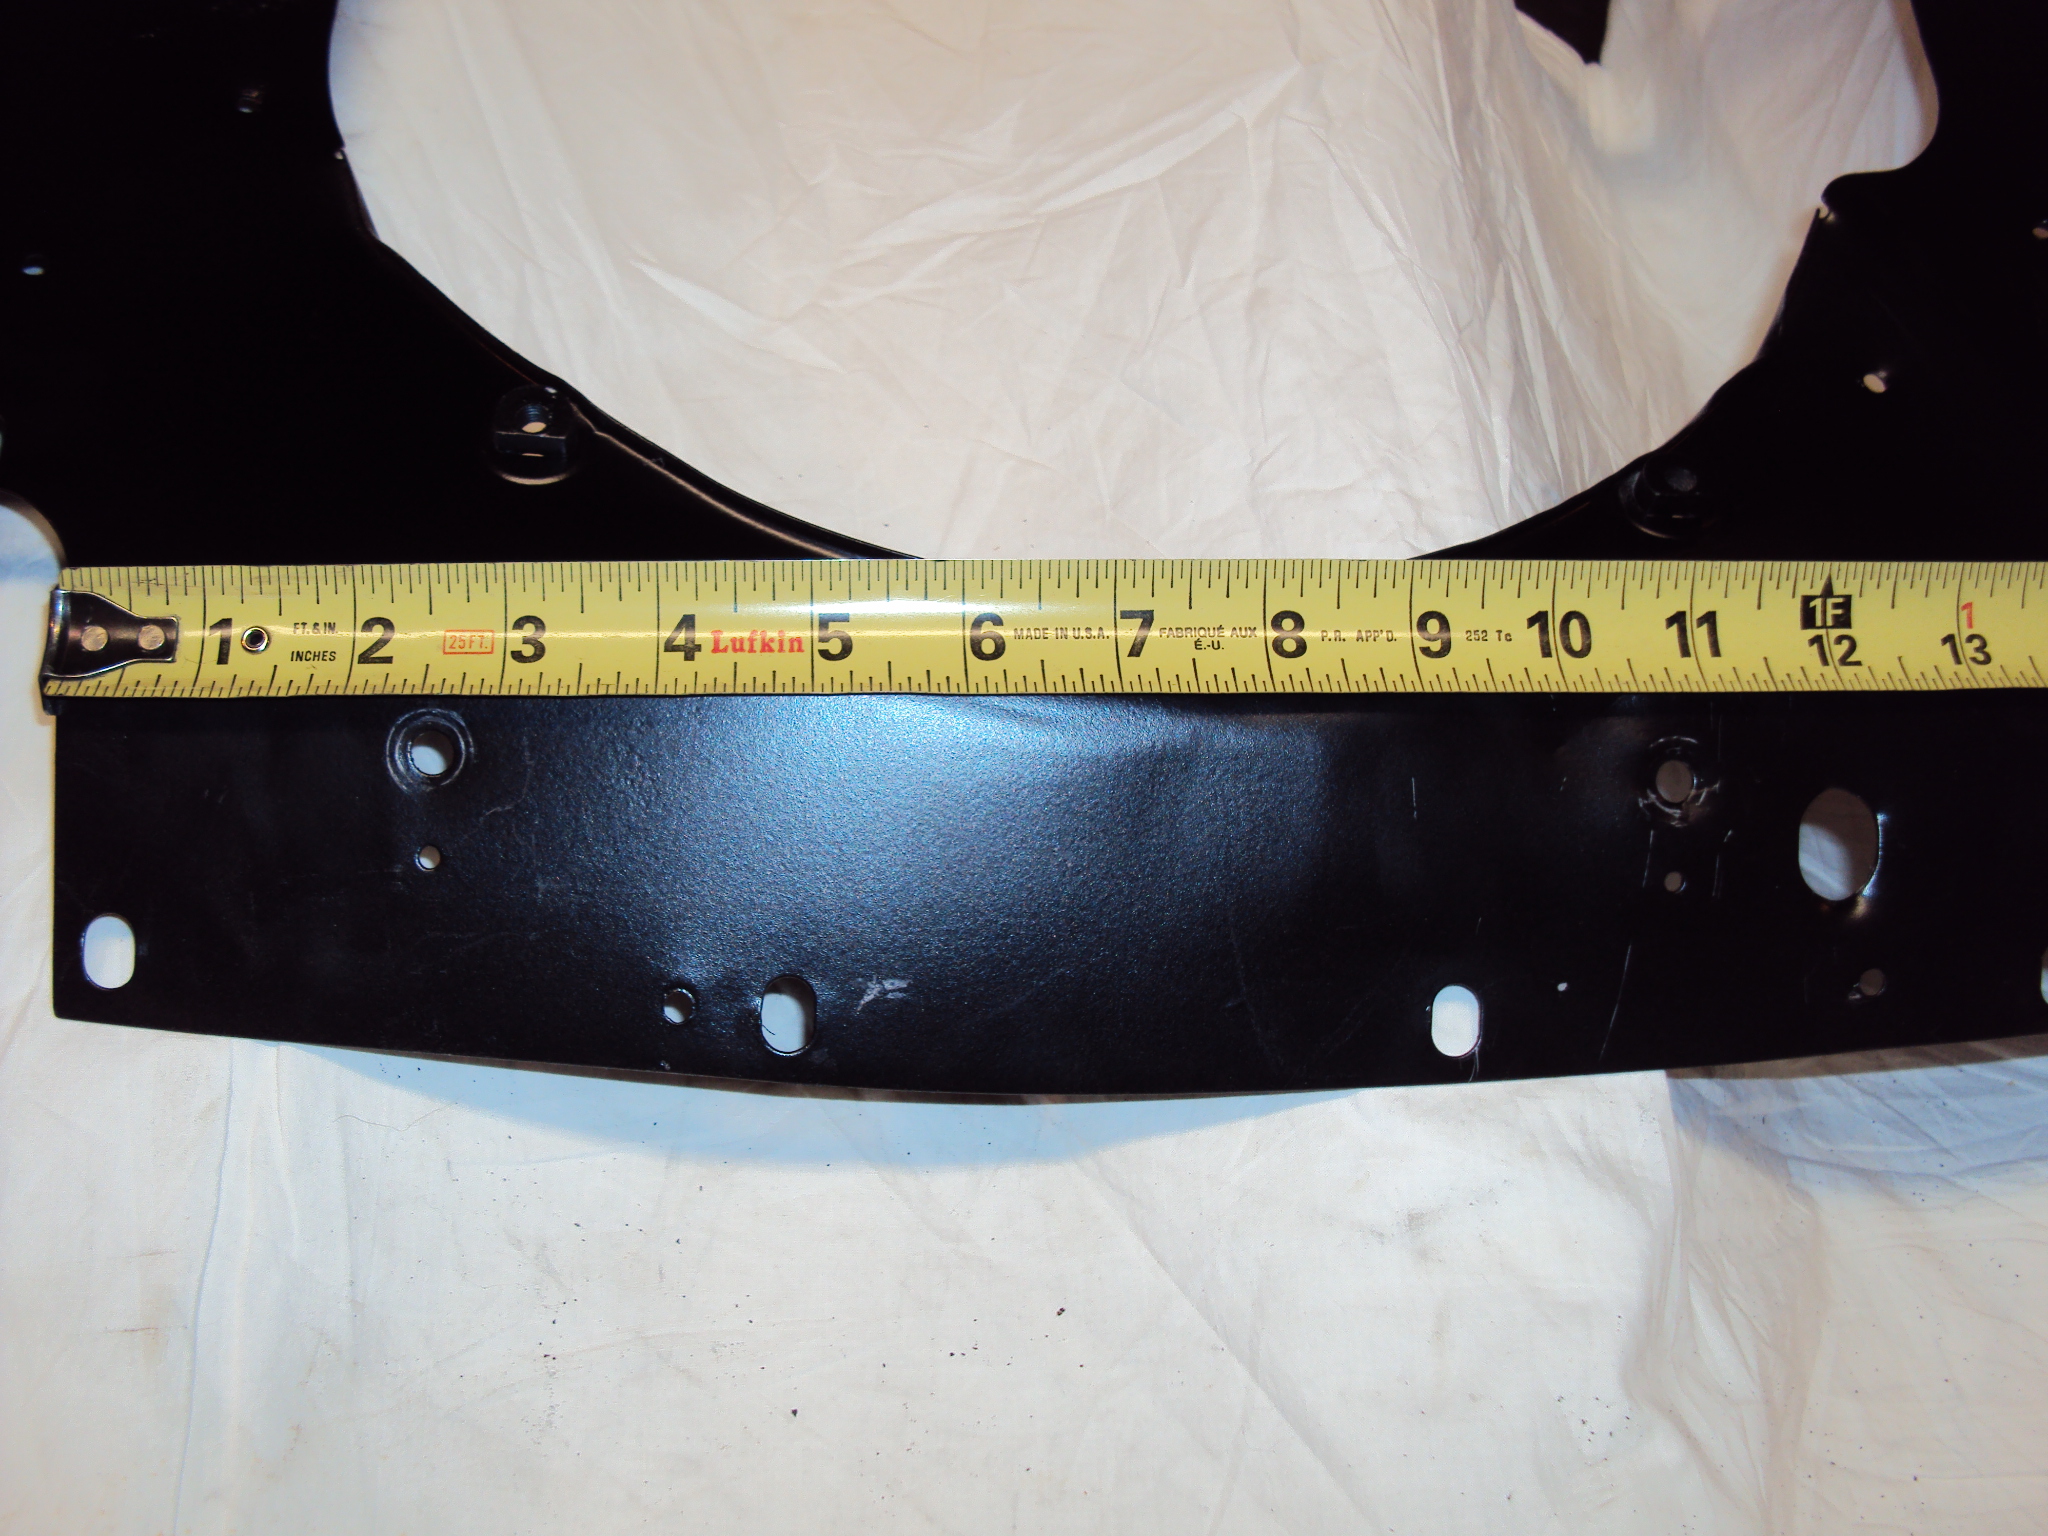
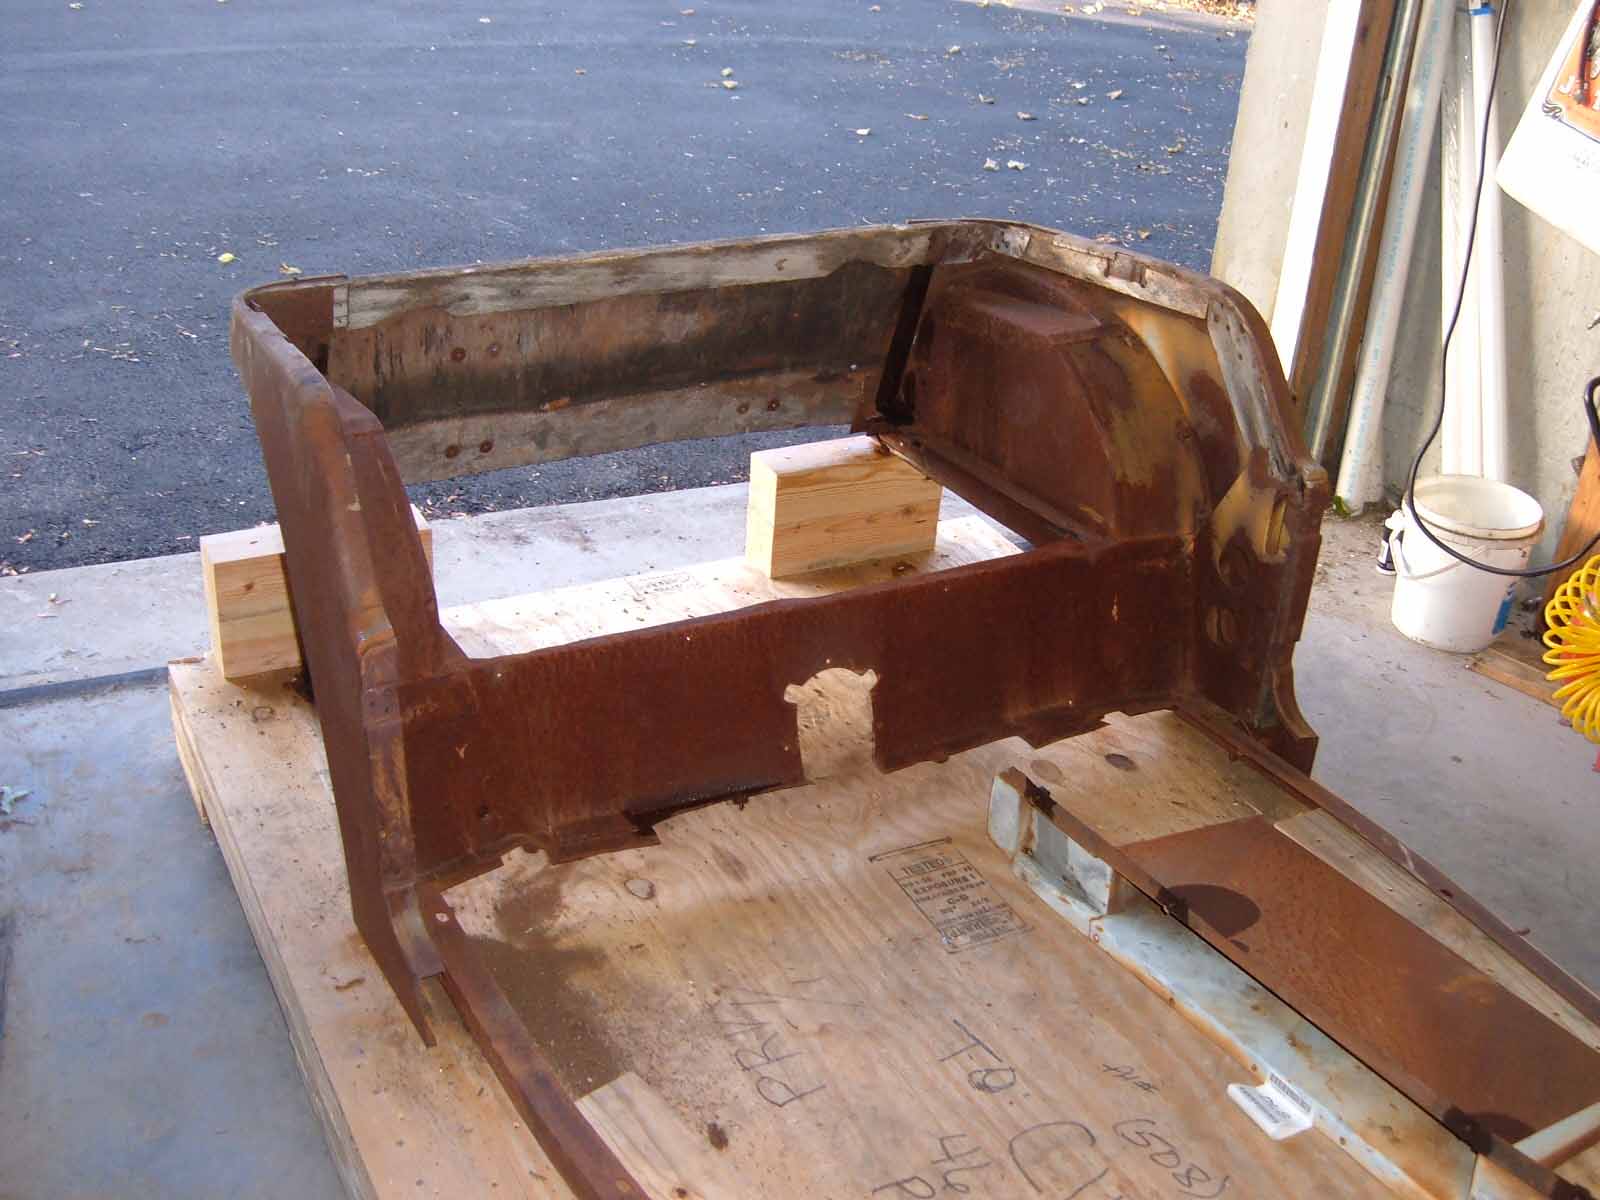
shocker was to discover that the rear cross brace assembly from the 'tublet' is
different from that of the original cross brace.
 Original is behind new cross brace. More on the tub will be forthcoming.
(Started 4/2/05)
Some recent events (9/4/08). I've gotten into the innards of the
engine and have some significant problems. Take a look here at
53Engine.htm
February 18, 2007 -- Update time.
Still no luck at obtaining a title for the car, but I've pretty well convinced myself that I'm going to 'restore' it enough to make it a drivable machine and let the next owner do the cosmetic restoration. A somewhat major accomplishment has been the refurbishing of the gearbox. It provided me with a great learning tool and the gearbox is now installed in Lazarus for tesgting. The engine is on my stand and I'll be getting into it shortly. Stay tuned for much to come.
A radio came with the car. Click here for details.
November 3, 2006 --- Tublet has arrived (click for a shortcut)
Story of The53
For Recent Images (4/7/2013) Click Here
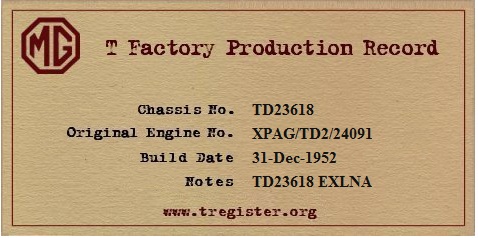
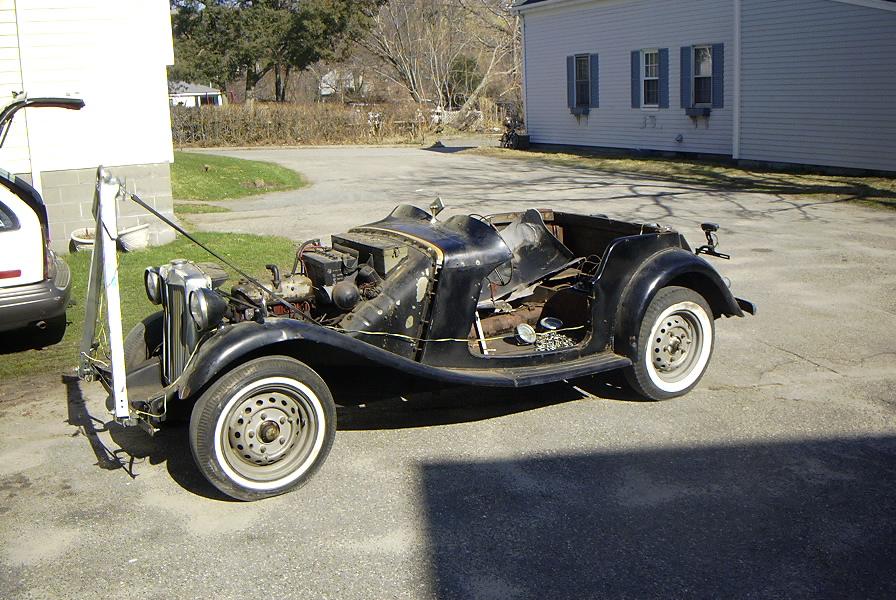
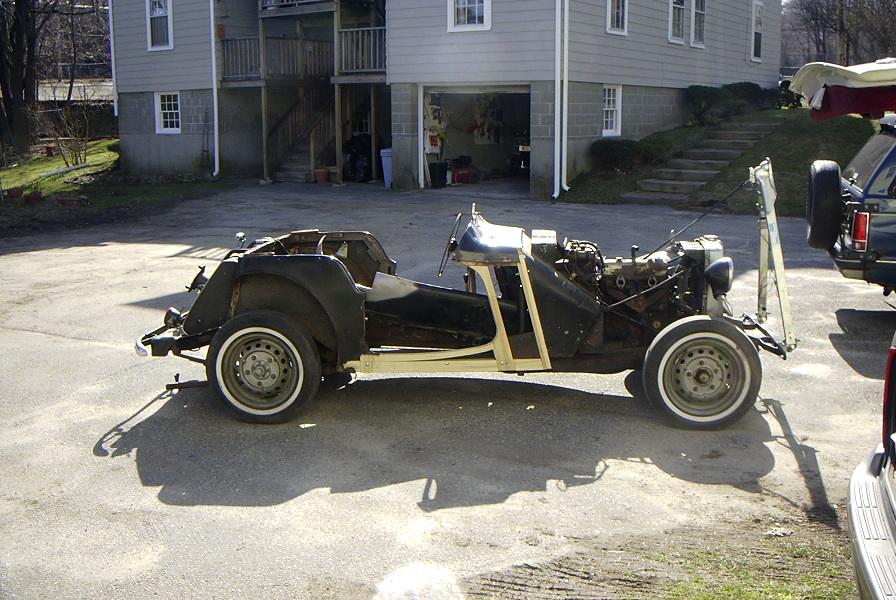
On April 1, 2005 I acquired TD23618, a machine that I'm just going to try to refer to as 'The53' so as not to get too attached to it. It would appear that saying "it's a '53" is slightly inaccurate. A look at the Production Date schedule published in the NEMGTR T Series Handbook shows that Car No. 23634 was the last TD produced during the month of December, 1952. I'd venture a guess that 23618 rolled off of the floor right ahead of 23634 on the last day of 1953. As usual, I'm somewhat rushing this page onto the site just to be able to share some of the information. I'll be upgrading it, along with better images as soon as I get the chance.
Added 9/4/11:
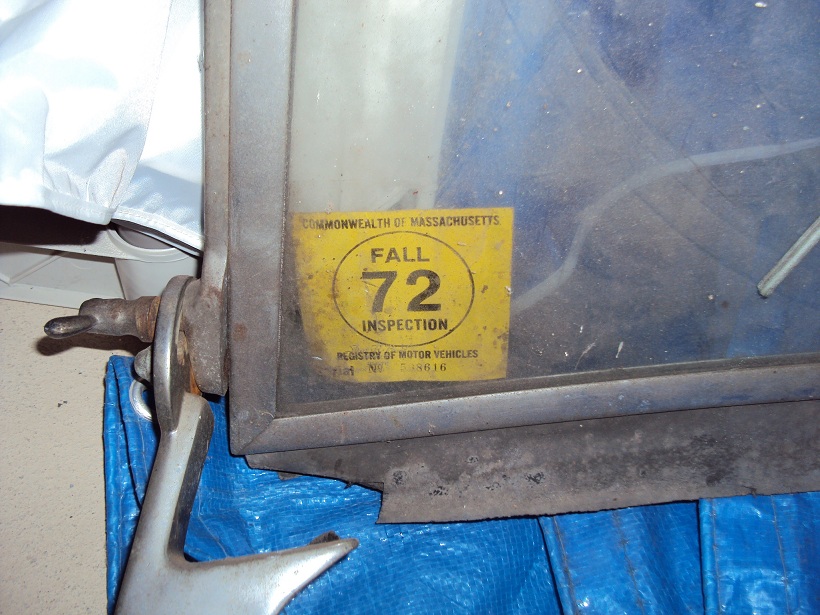
The history of the car is full of gaps. After the Mass. Inspection sticker of 1972 there is nothing known about the car until it surfaced in 2000. A relative of the late owner during the 60's belies that the car had been taken to Connecticut by another relative in the early 70's. The person that I bought it from said that he thought the previous owner said that he bought it in Connecticut. The car now has a valid Massachusetts title.
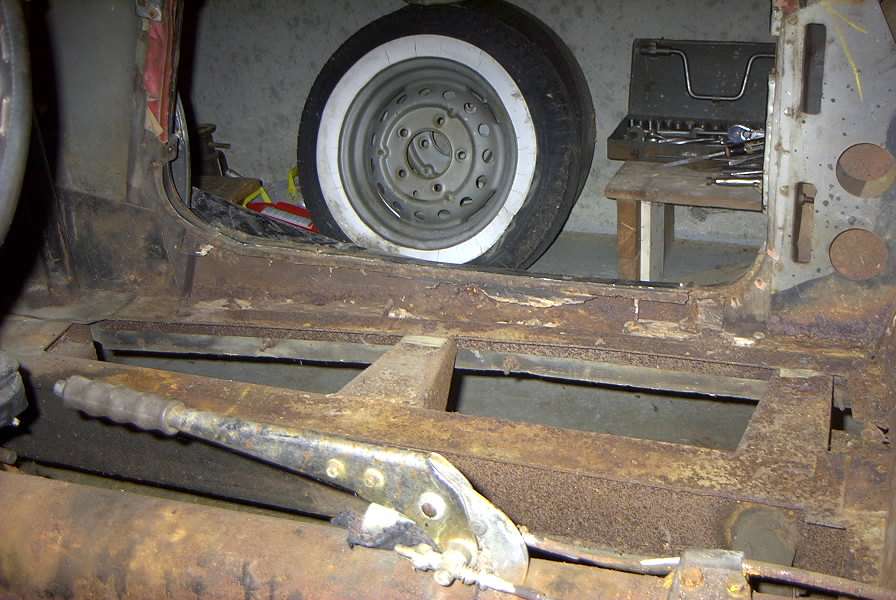
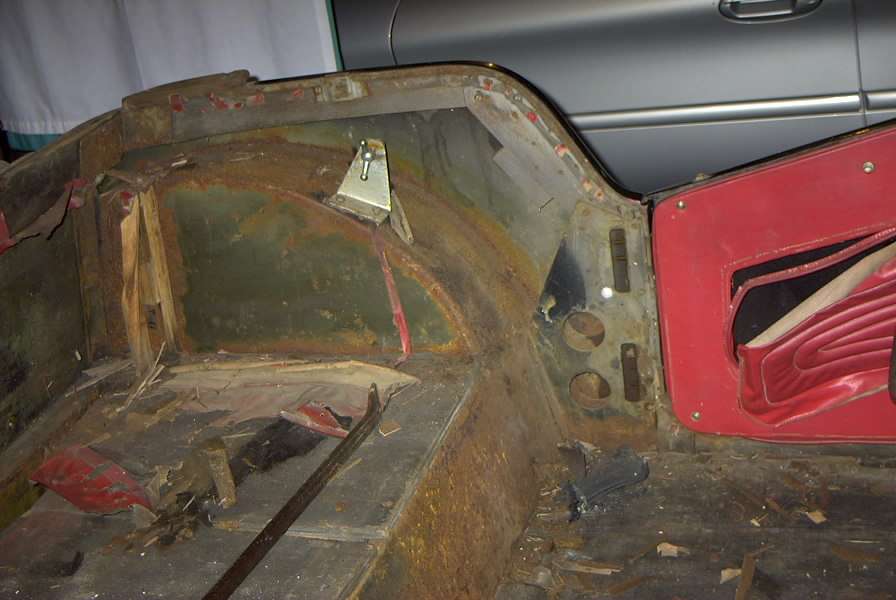
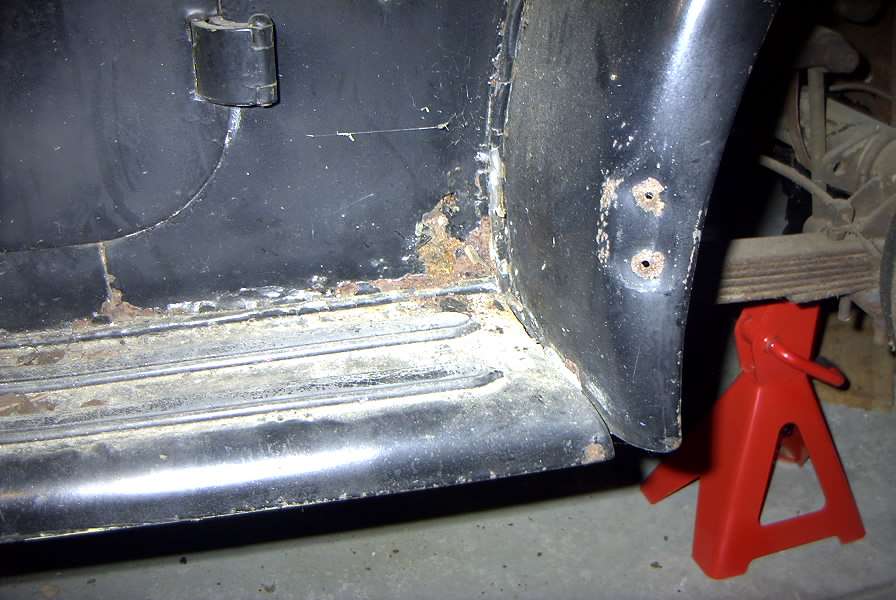
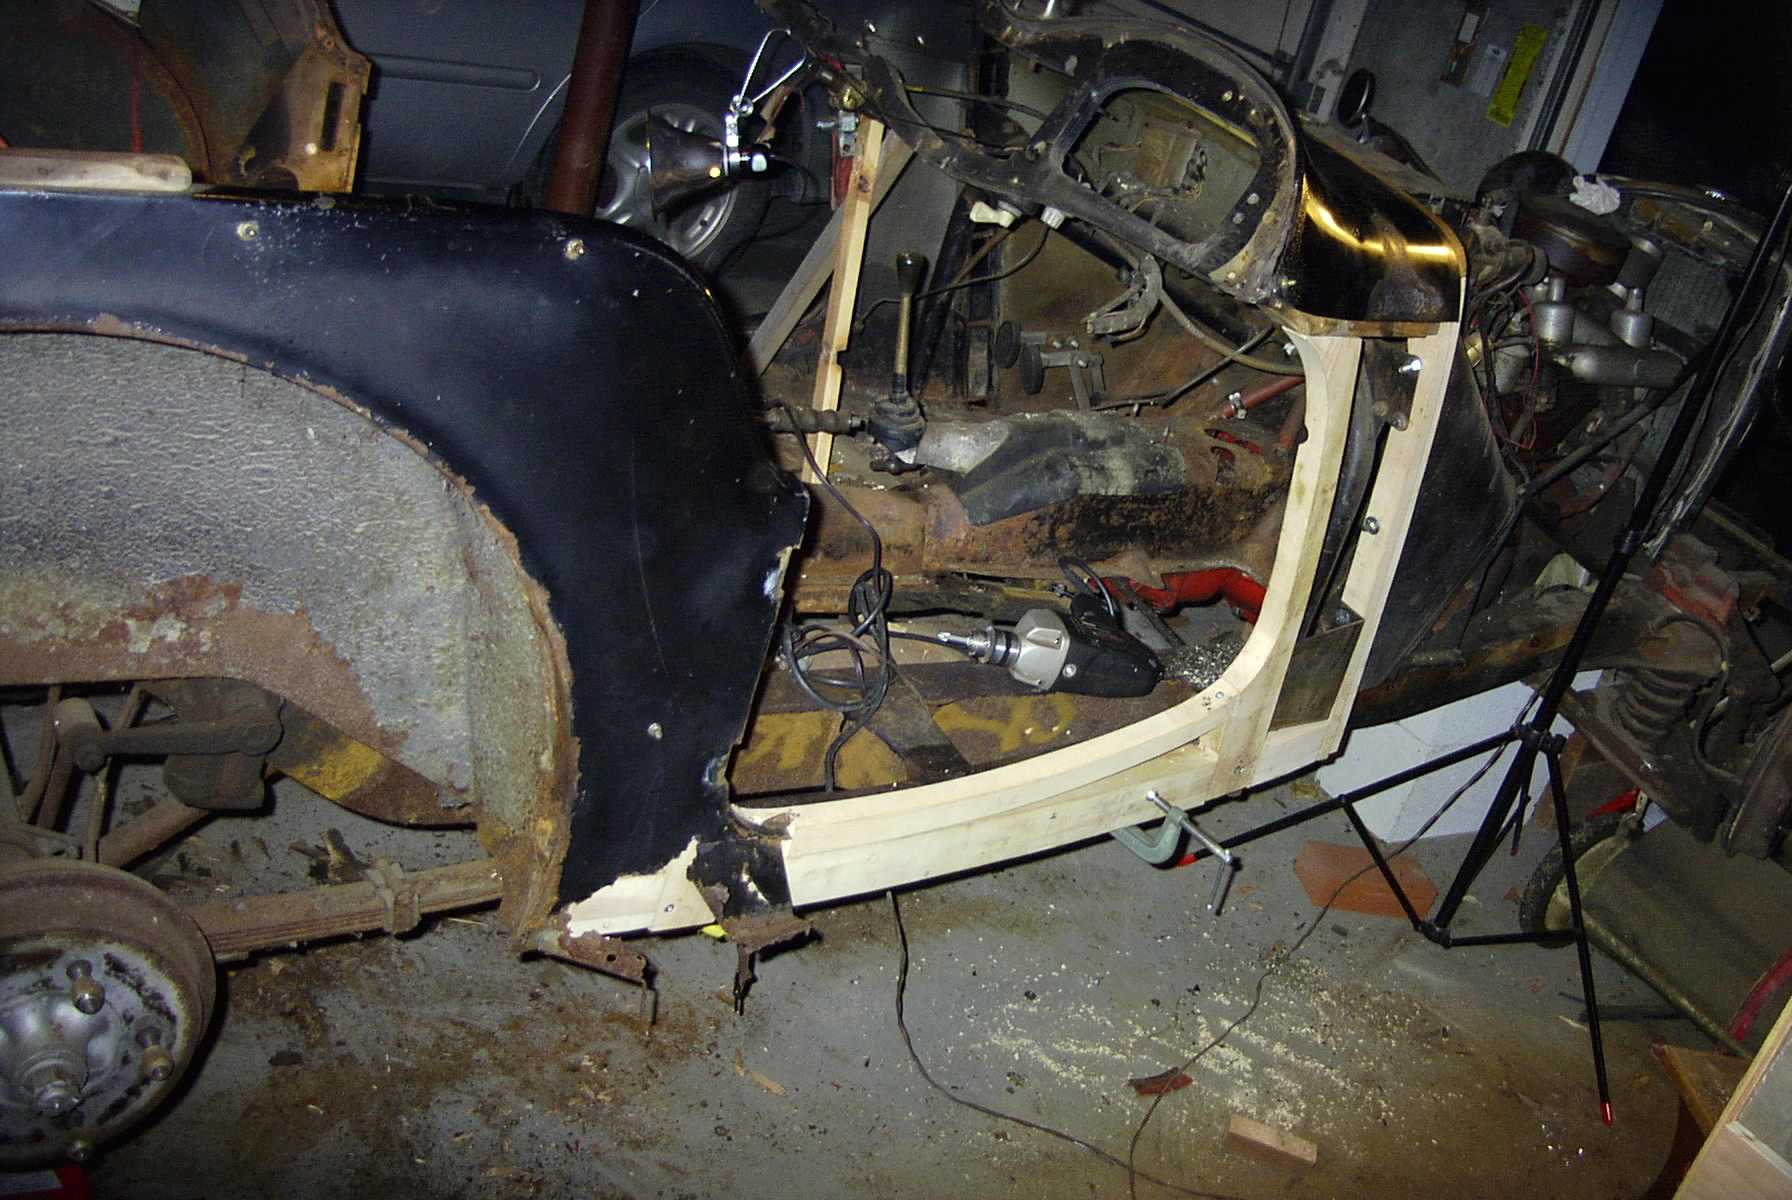
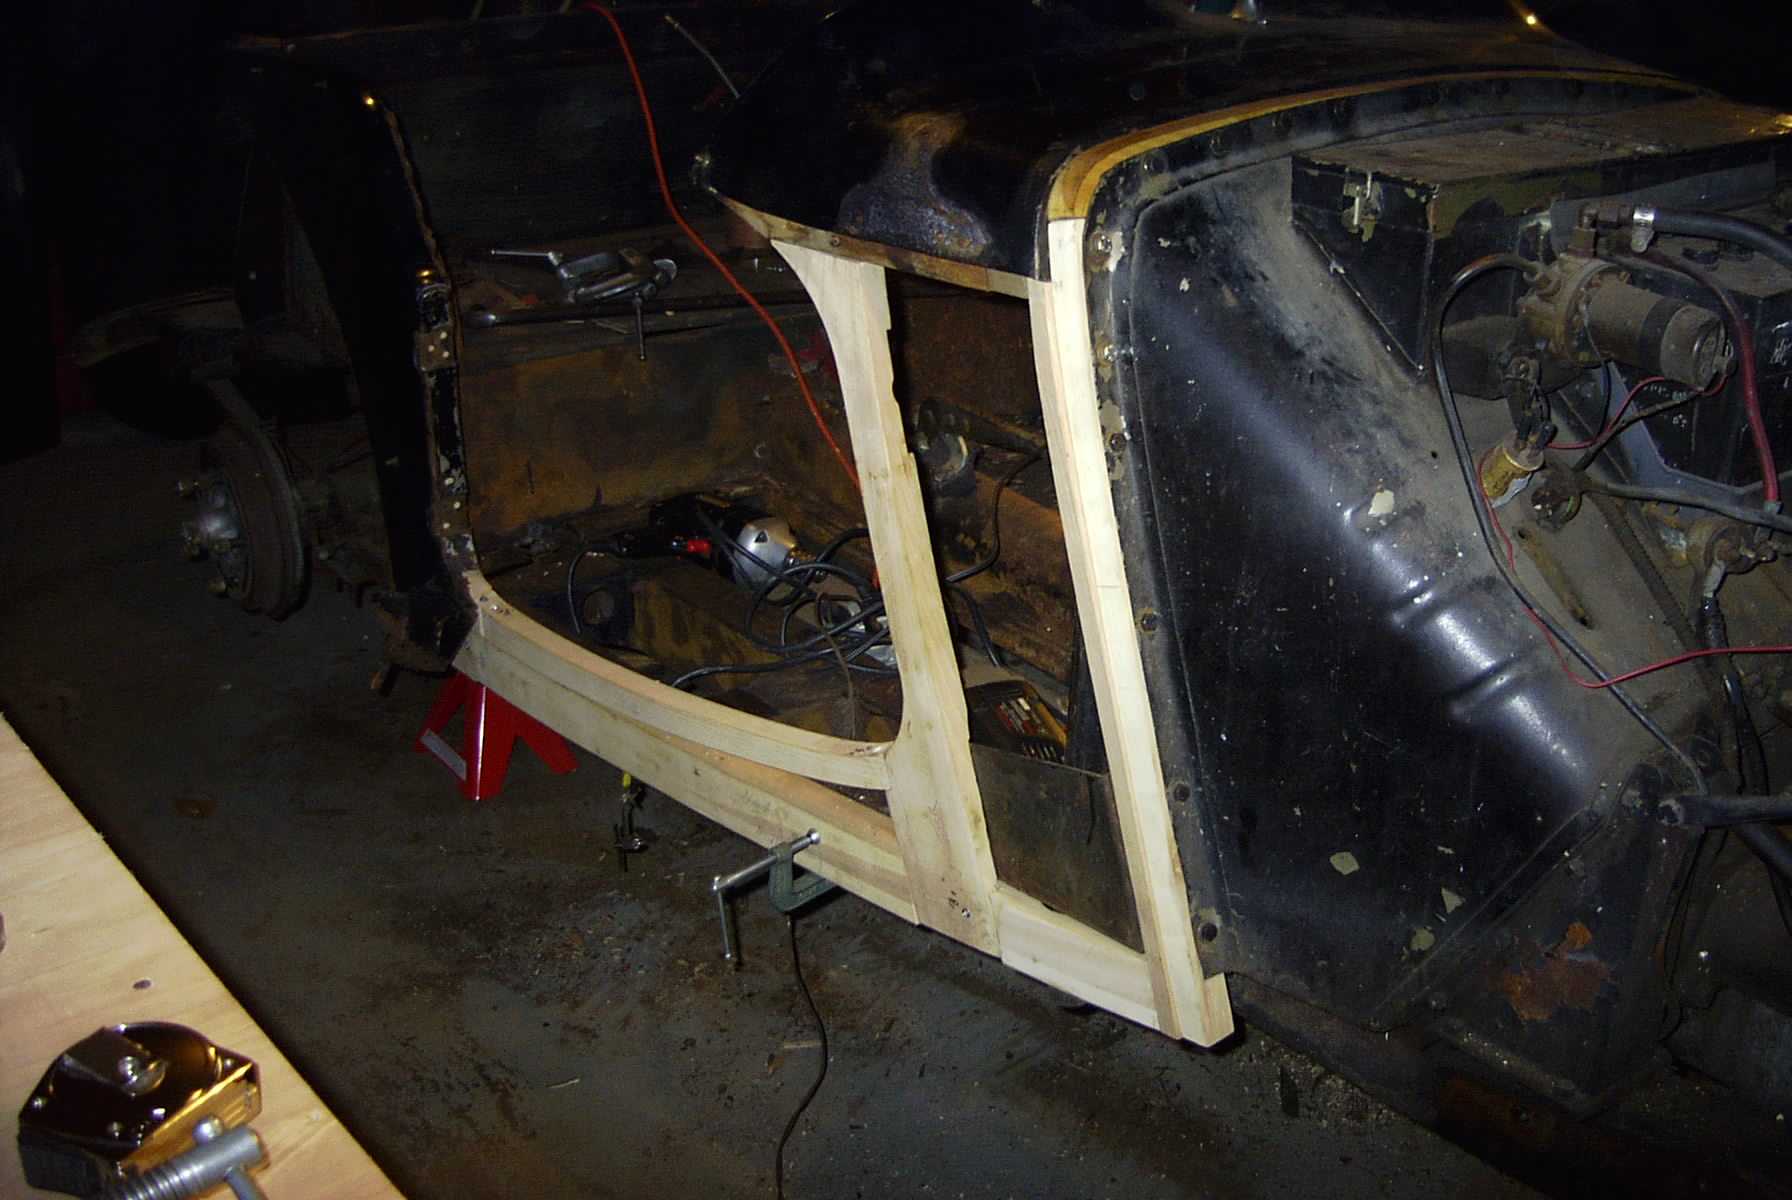
The car is in rather rough shape between wood rot and rust worm infestation. I bought the car from a former fellow colleague at Polaroid, he had purchased the car about 3 1/2 years ago, fully intending to restore it. Tempus fugit, and he has now also joined the ranks of those of us who have been put to pasture by Polaroid. He is quite adept at woodwork and had begun replacing some of the rotted wood. Indeed, he replaced all of the wood around the right side of the tub.
Here are a number of images of the car showing some of the bad areas and some of the new wood that's been installed. They're all thumbnails, so click away:


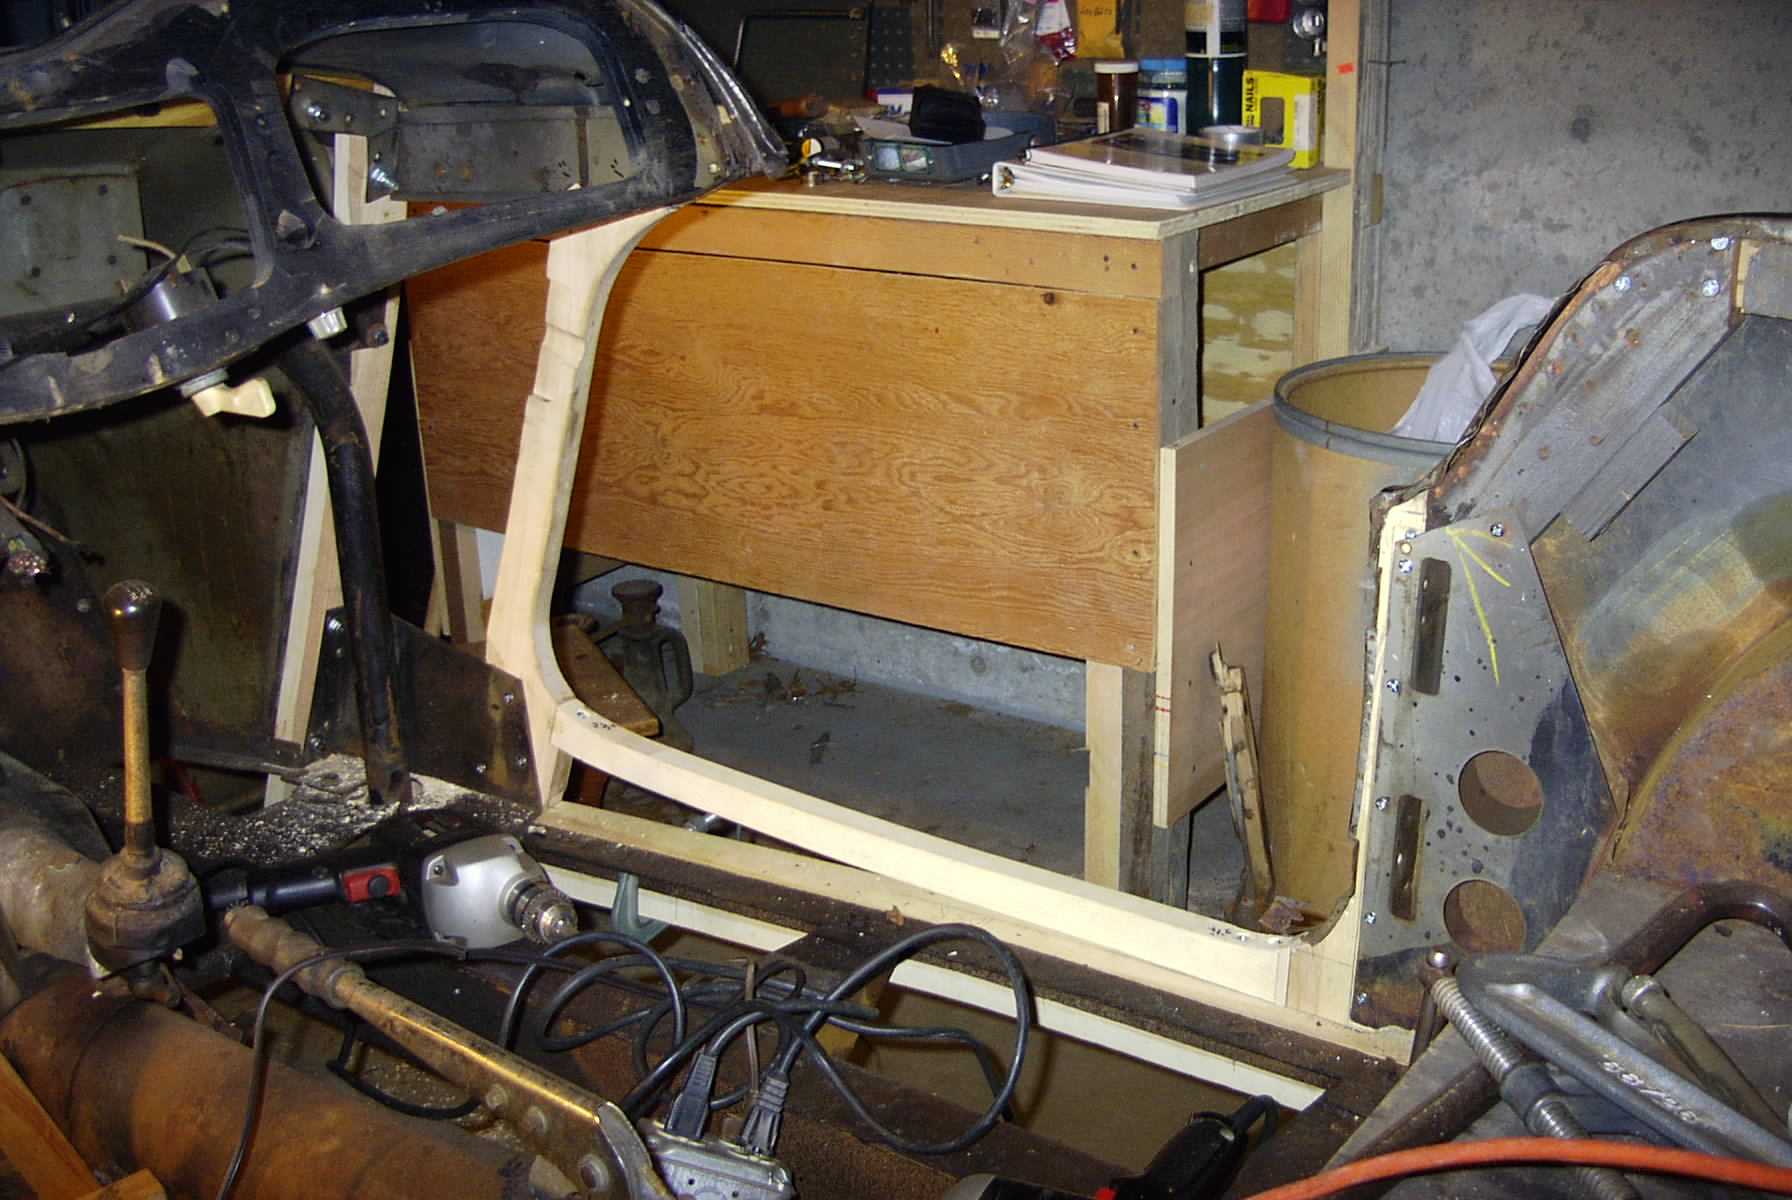
And some of the new stuff:

Numbers:

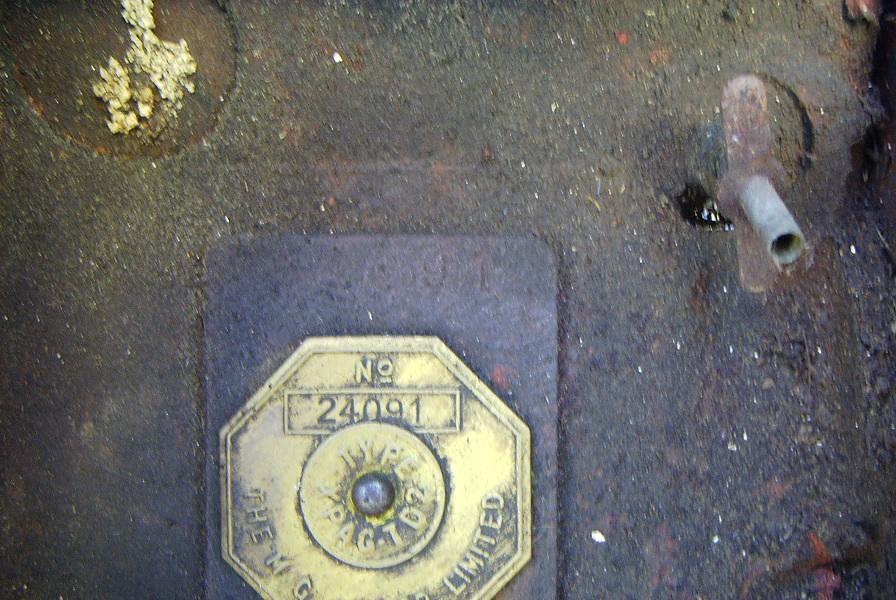
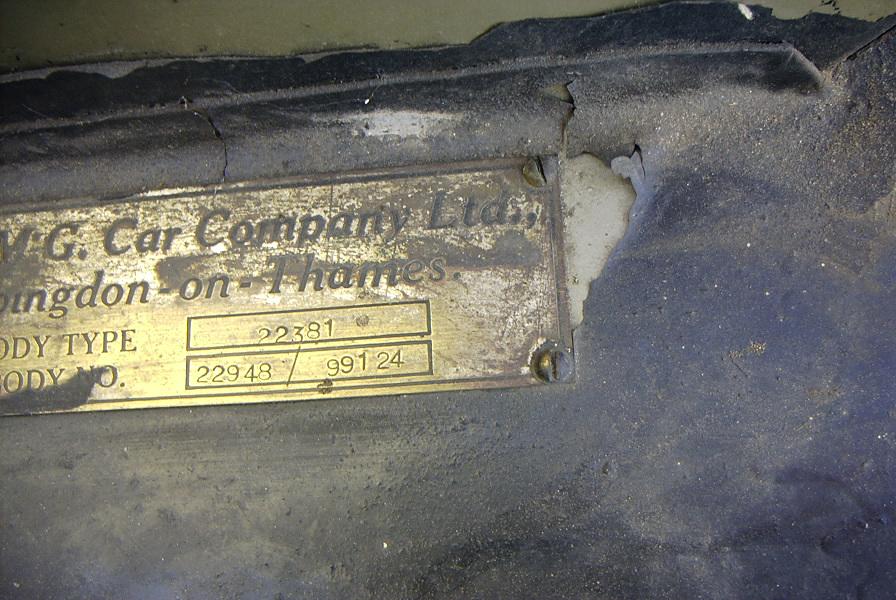
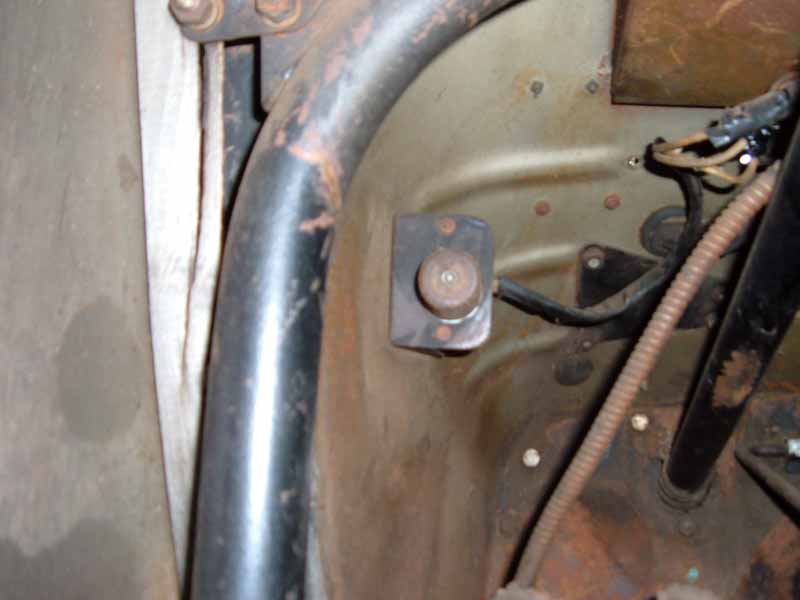
The odometer shows 86234 miles. On the windscreen is Massachusetts State Inspection sticker from Fall 1972. In side of car was found a plate saying: 'The New England MG 'T' Register Member No. 435'. I'm contacting the Register to see if I can find out who identifies with #435. It's obvious that the car was originally painted Silver Streak Gray, though it was repainted black at some point. The upholstery is red. A number of points of originality have shown up in answer to some recent questions, e.g., the location of the turn signal flasher:
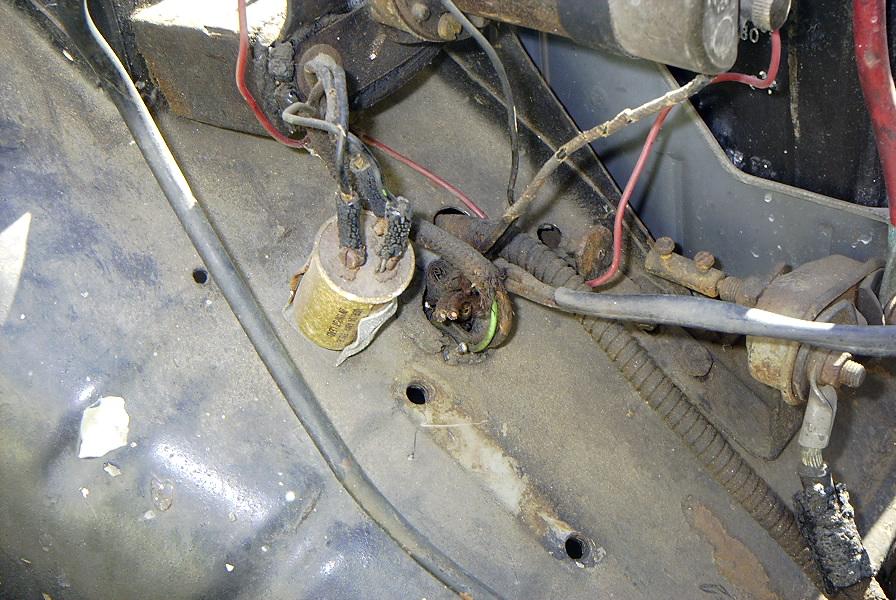
It's in the vicinity of the right horn.
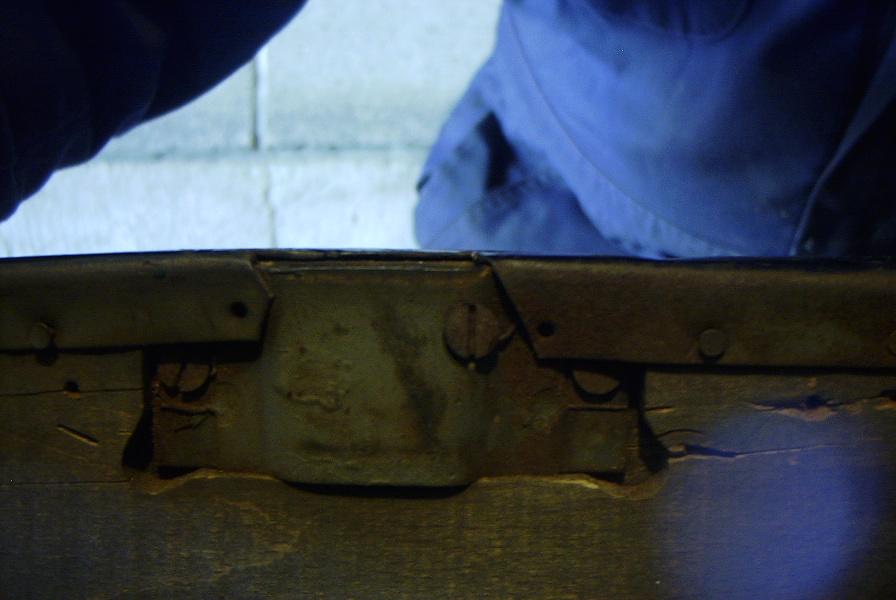
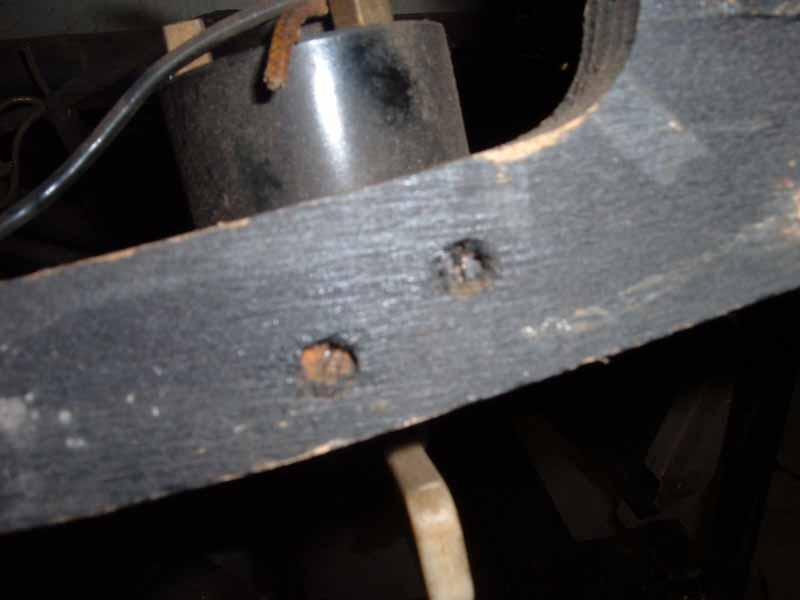
Without upholstery it's easy to see the details of the sleeve for the rear side curtains. The 'pin' is obviously the shank of a flathead screw that goes through the sleeve, in addition to the two screws that attach the sleeve to the top side rail:
Stay tuned, there's lots more to come.
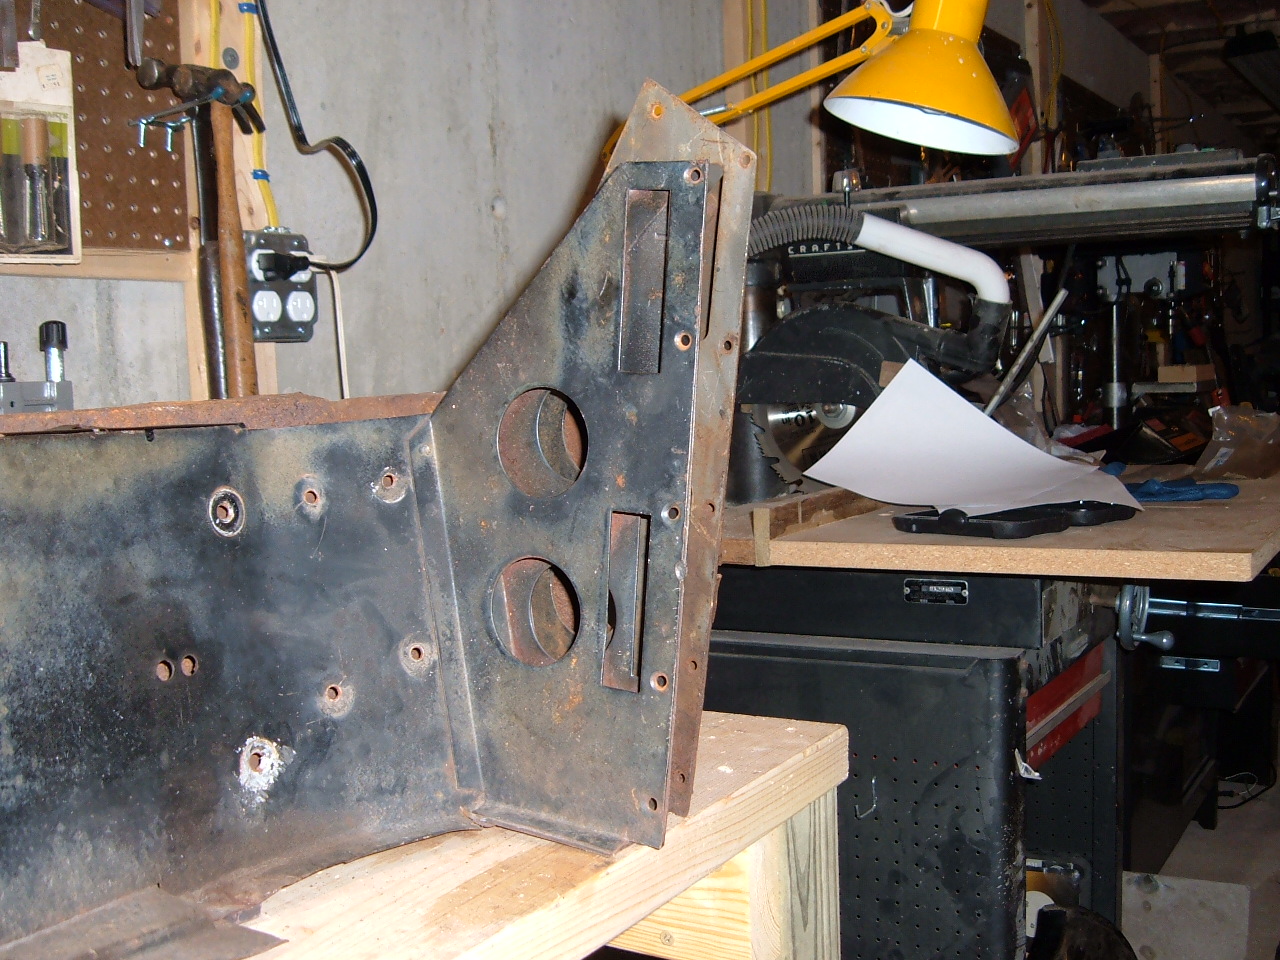
Here's the location on the firewall of the dipper switch
mounting screws:
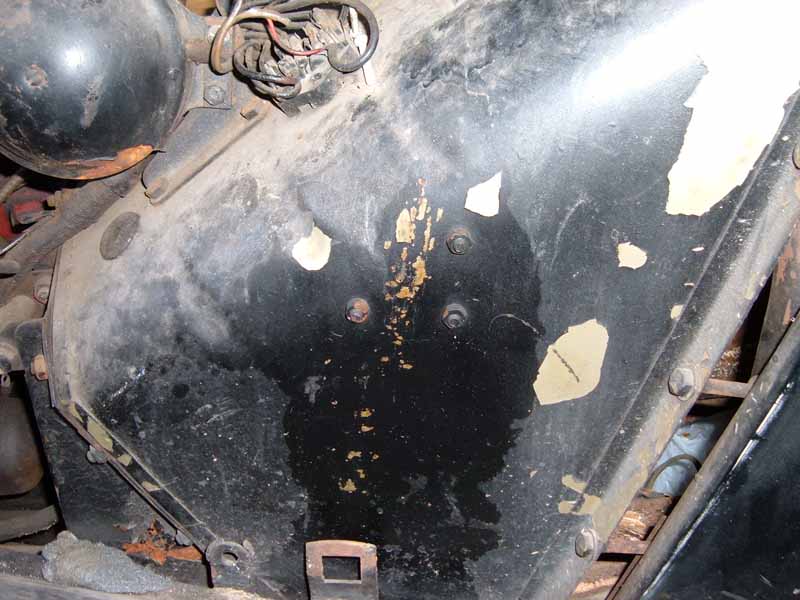
Here's looking at the dipper switch from inside:
Here's the instrument panel: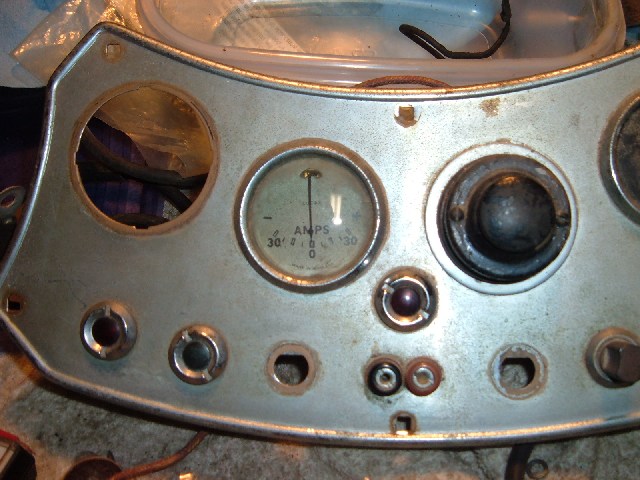
Note that the turn signal indicator light is the same resistor-wire socket as the other lamps. The ignition warning lamp is red and the petrol warning lamp is green. The car is late enough so that the high beam indicator is in the speedometer.
11/3/06 --- I'm softening and seem to be on my way to somewhat of a restoration. It is now my intent to bring the car to a state where it is drivable and ready for some enthusiast who wants to restore it. It's far too original to part out. My solution to the rustworm issue in the rear quarter panels was to locate, and purchase, a 'tublet' from Texas. It should be arriving today. More later...
Originality: As I discover originality points that I think may be of interest I will try to record them and list them here with links to the items:
Turn Signals: Since the car was produced in late December, 1952 it would have had turn signals installed by the factory. Four areas of interest show on the car:
Relay location: Mounted inside of the tub on the back of
the toolbox:
Switch location: On back of dash, to right of gearshift:
Switch mounting: Two flathead screws through inner dash
wood:
Indicator lamp: Located on the instrument panel above
inspection sockets:
Flasher location: Under bonnet, by right side horn:
ToeBoard/Gas Pedal: Images are thumbnails, click for full size
Hole Alignment
PedalMounted
ScaledMounts
ScaledWithPivots
ScaledPivotHoles
Pedal1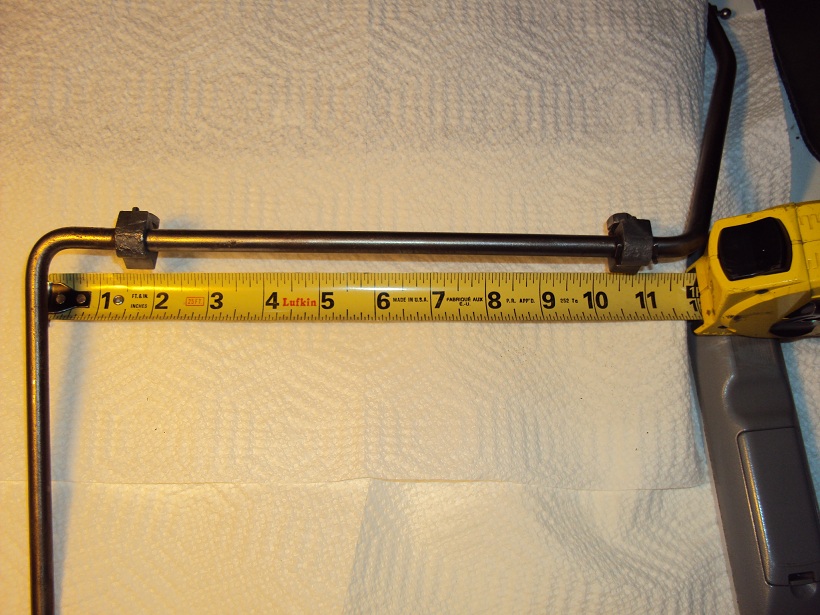
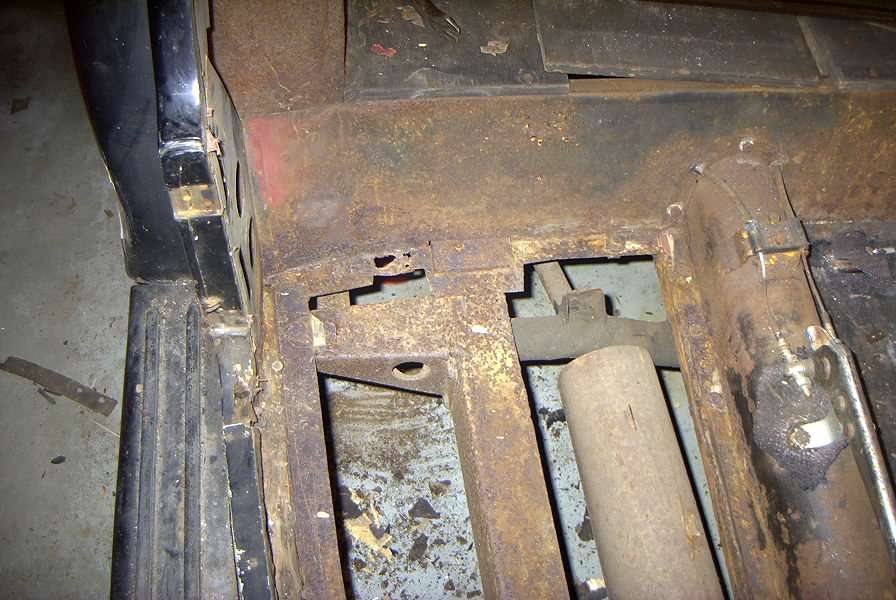
I decided that the rustworm infestation in the rear cross brace assembly plus the rear quarter panels and inner wheel arches was not worth trying to repair. Horror stories abound on the use of reproduction panels so I began a long search for non-rusted metalwork. Fortunately, I has able to locate a complete rear tub ('tublet') that, though it's coated with a lot of surface rust, is basically solid. Dry rot has caused the wood to virtually disappear.
The tublet was found in Texas as part of a very large stash of MG parts uncovered by George Merryweather. As happens in life, the cost of getting the tublet from Texas to Massachusetts was more than the cost of the tublet. At least this one still has the captive nuts for attaching the rear fenders, etc. Stay tuned, more to come.
3/8/13 Update -- The tublet was an expensive disaster. I proudly posted an image of it onto the UK MGBB. It didn't take long before someone spotted the flat tops on the rear wheelwells and identified the tublet as being from a TF!!! It cost me $700 to have it shipped from Texas. I'm still trying to sell the parts after having had them media blasted and powder coated. I eventually found a solid TD tublet that I've used on the53.
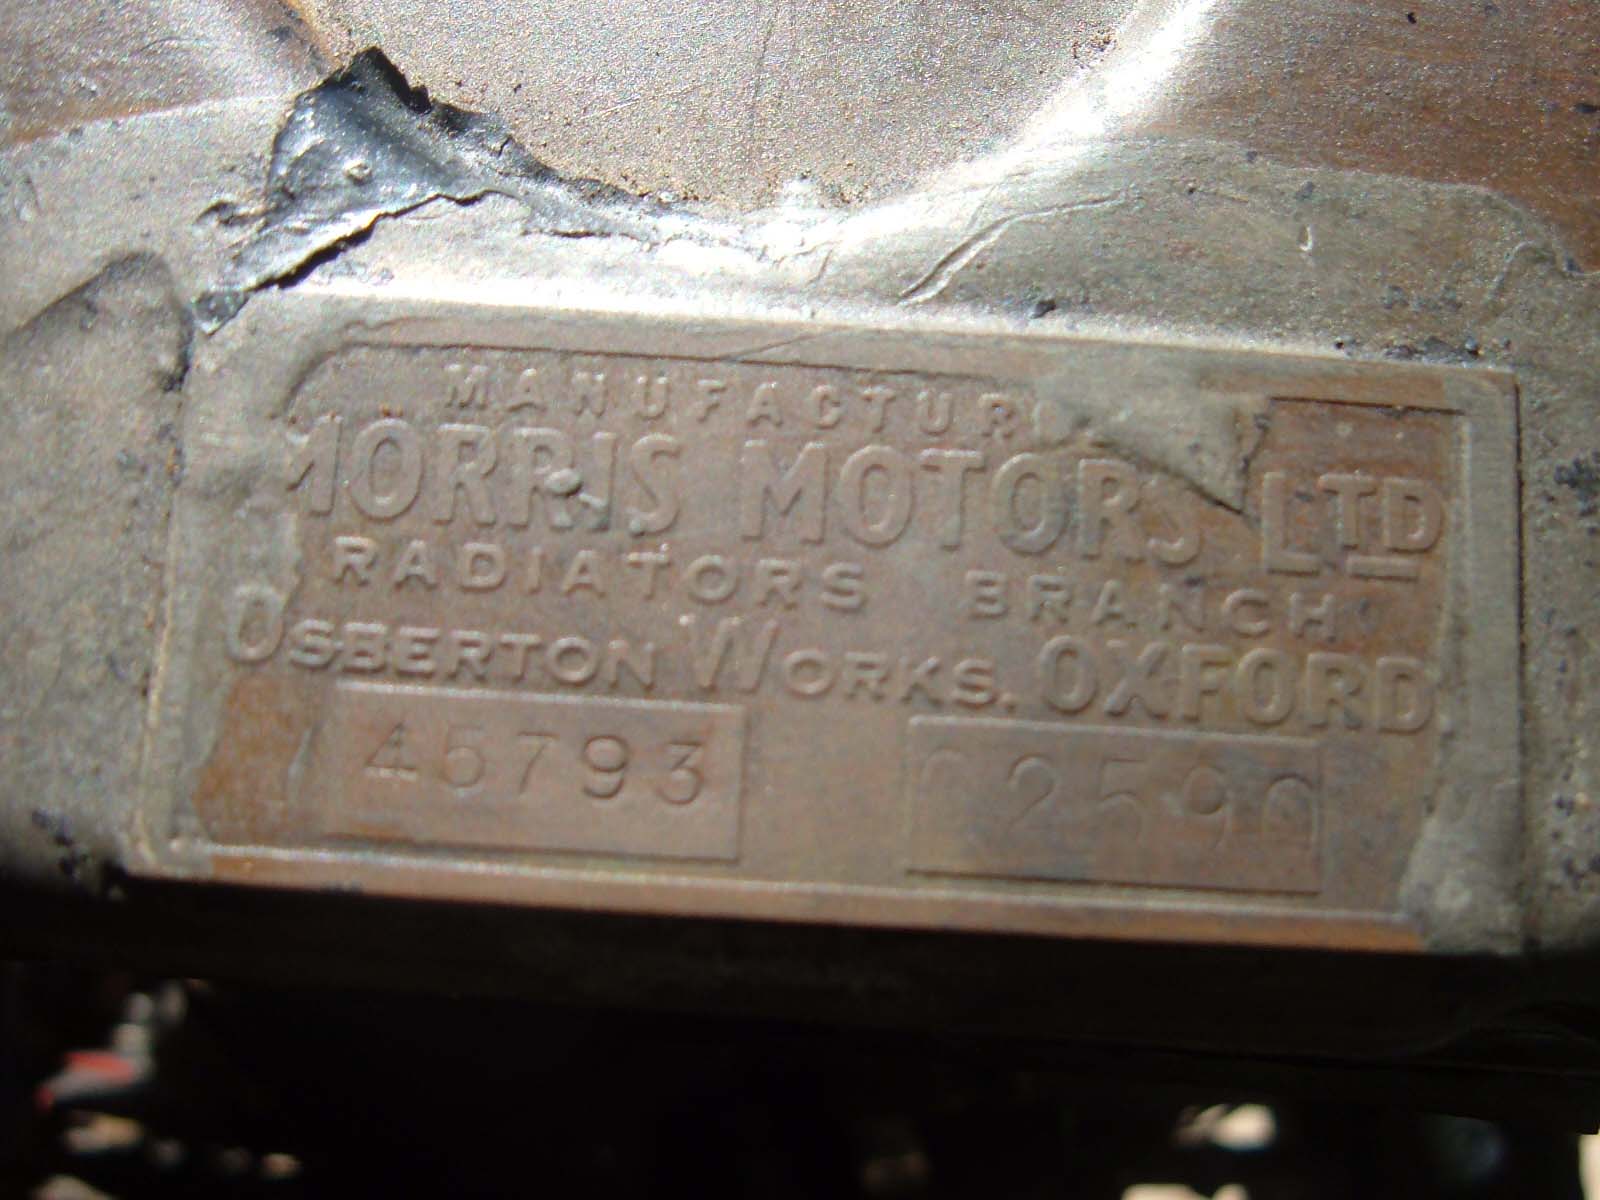
Plate on top of radiator:
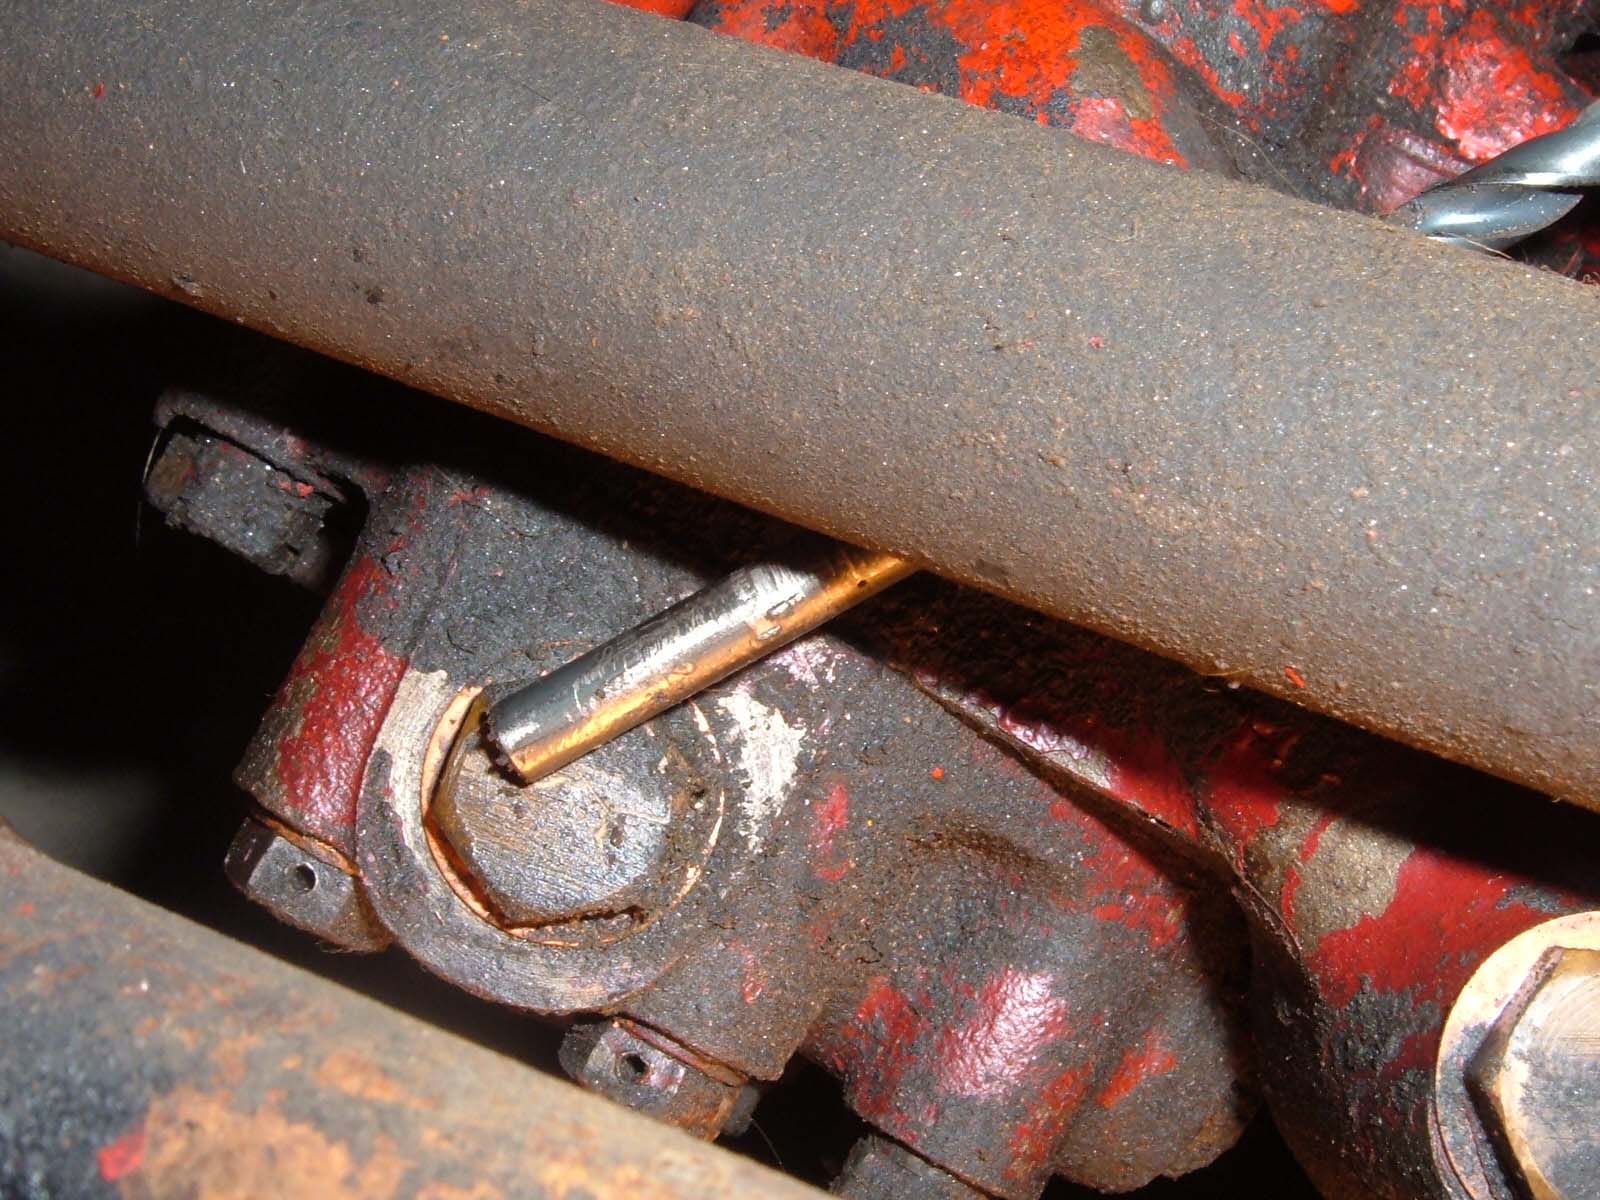
Clearance between Oil pump and steering column can clear 7/32"
drill bit: