Locating and Installing the Hood Sticks: The goal was to have a hood that, without too
much inconvenience, could be completely removed from the frame and
stored somewhere other than in the boot when not in use.
Because I hate driving with the hood up and carry it only as
a last resort should I misjudge the weather (i.e., get caught in
serious rain) I was willing to sacrifice a small amount of
convenience for the benefit of full removability. The first step which was the same as with a
conventional installation was to locate the hood sticks.
The frame had been installed by the PO but apparently the
locations of the pivot points were selected pretty much at random.
Even without the canvas the frame would not fold into the
boot and it could barely be hooked over the windscreen posts.
Following the lead from Dave Braun’s site, I
set the height of the horizontal member above the lowest point in
the door sill at 19-3/4 inches.
I hooked the front cross piece over the windscreen posts and
clamped the pivot flats to the inside of the tub.
I took a look and saw that the passenger side of the frame
was noticeably higher than the driver side (I had no expectation
that my car would be “square”).
To accommodate this I shortened the passenger side height to
19-1/2 inches and relocated the passenger side pivot flat
accordingly.
Once I was satisfied with the location of the
sticks, I marked the location of the holes in the pivot flats and
drilled some pilot holes into the tub wood.
I followed these drillings with larger ones that allows me to
insert 10-24 brass threaded inserts so that I can unscrew the and
rescrew the thing without augering out the hole as one is wont to do
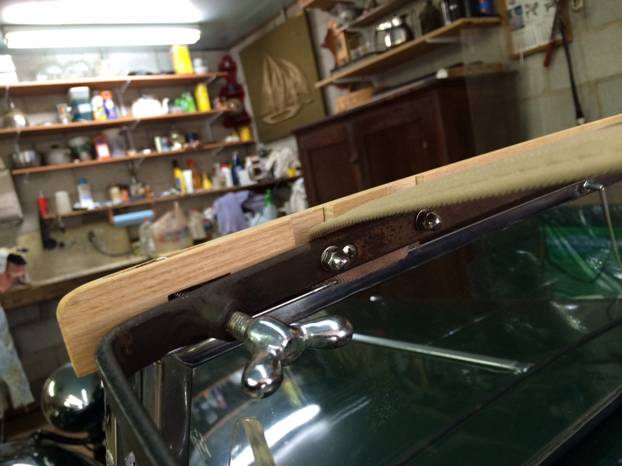
with wood screws. Installing the Top Rail and Side Stays: I wanted to be able to remove the top rail and
detach to side stays without having to cut or undo the excluder
strip. I attached the
top rail to the front of the hood frame with 10-24 SS machine screws
into brass threaded inserts.
Before attaching the top rail I carved out reliefs to the
folded edge of the side stay straps and attached the straps to the
metal rail with SS machine screws and acorn nuts.
Not unlike Dave B, I was unable to figure out
how to install the copper liners in the holes for the windscreen
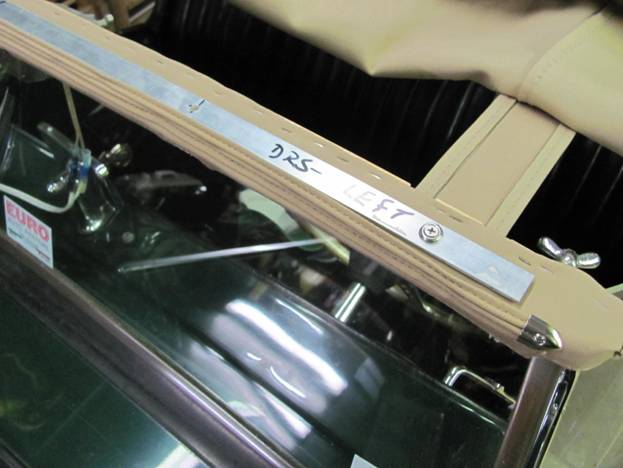
posts so they are still in a baggy on my parts wall. Installing the Side Stays Rear: Following the lead of Dave B and others, I did
not want to attach the hood to the rear tacking strip with screws or
anything permanent and I decided that I wanted the same for the rear
attachment of the side stays so the complete removal of the hood
sticks would be relatively easy.
I figured if snaps work for the hood they’d also be OK for
the side stays so that how I proceeded.
The initial plan was to secure the stay with a single snap as
shown.
It turns out totally by coincidence (but I’d do
it on purpose if doing it again) that the single snap for the side
stay on the tacking strip aligns exactly with the outer rear snaps
for my tonneau cover so the clean things up a bit I folded up the
end of the side stay strap, put in another snap to hold the fold in
place and located that snap over the tonneau male snap, to wit:
Now we’re on a roll and here’s what it looks
like:
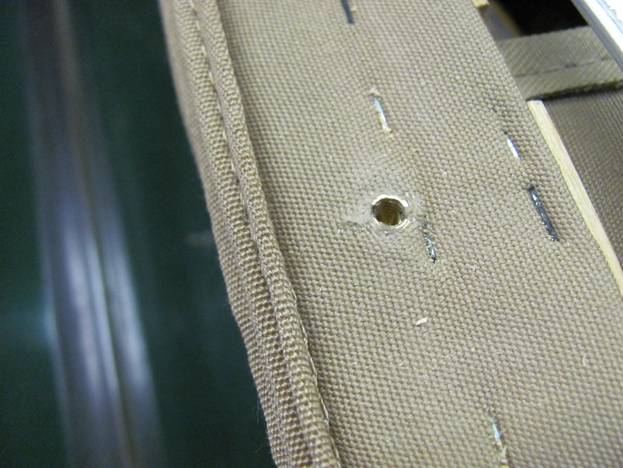
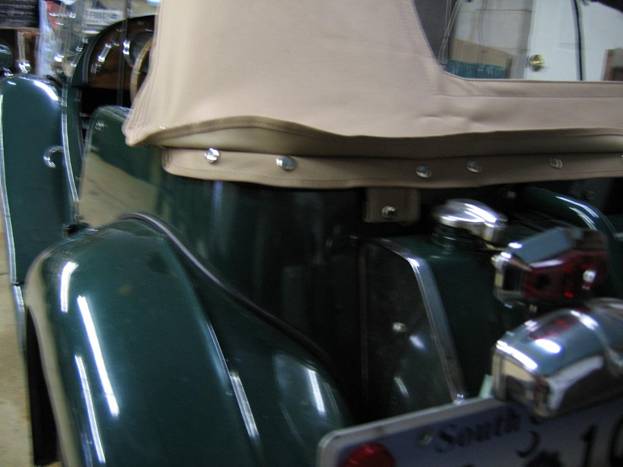
Installation of Hood Canvas – Rear As mentioned above, I used snaps instead of
screws to attach the hood canvas to the rear tacking strip.
I probably should have gone to a boat store and gotten some
perhaps higher quality SS snaps but I found convenient packages of
snaps with wood screw male bases that included the punch, a guide
and an anvil at my local Lowes so that’s what I used.
I may have gotten carried away with the number of snaps
installed but I just kept pulling out wrinkles and looseness and
inserting snaps until it began to look pretty good.
At this point the front of the canvas is not connected to the
top rail over the wind screen so to give myself a bit of resistance
while tugging on the rear to locate the snaps, I held the front of
the canvas over the top rail and windscreen with squeeze clamps.
click here on Hood1.doc
Ttalk.info
Removable TD Hood by Jud Chapin
Chapter 1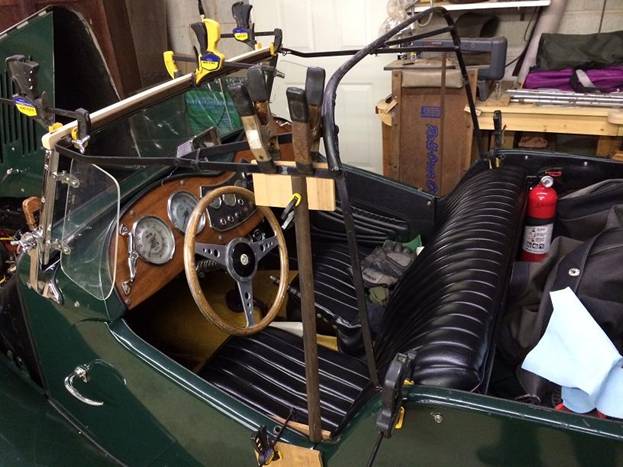

For original file