Ttalk.info
(This document has been provided by Colin M. Stafford)
An Expletive Job….Changing your valve guide seals on XPEG/XPAG
A head on experience.
-
Remove the valve cover
-
Remove the rocket shaft assembly by undoing the 8 bolts which hold it place.
-
Remove all four spark plugs.
Removal of the valve spring retainers.
1. You need a valve spring compressor, like a K-D 2078 (see pix.)
2. In the spark plug hole you will put in the threaded fitting and air pressure hose connecter (see pix )
3. With the piston at TDC, connect air compressor and apply 90 psi to the cylinder. This will hold the valve in position while you remove the keepers. It’s a good idea to put car in gear and apply the parking brake as 90 psi will push down piston .and the move the car.
4. Attach the valve spring compressor to the valve spring, making sure you have the long leg hook at the bottom of the spring. Make sure you have both arms of the compressor locked onto the spring. Then tighten the compressor knob until spring is fully compressed.
5. Push down on the top of the compressor to depress the valve retainer and expose the two semi circular retainers. It is useful to have the aid of 250 lb, 6 footer. These retainers can usually be removed with a magnet pick. Sometimes it is necessary to soak them for a few days with P-B Blaster or WD-40. If they do not release, you will have to give the top of compressor a few sharp raps with a hammer to break them loose, and then try depressing the valve retainer again. You may have to pry them out with a sharp pick. This difficult to do and it’s easy have them fly out and get lost. It’s a good idea to have some extra retainers on hand. The cost $5.00 each to replace.
6. Once they are removed, lift the both valve springs, oil deflector and retainer disc off of the valve stem. It is a good idea to wrap wire around the top of the valve to prevent it falling into the cylinder after the air pressure is relieved.
7. Remove the oil deflector and discard. (see pix) They cannot be used with the new type seals as they interfere with compressing the springs to install the valve retainers.
8. Remove any remaining pieces of the rubber oil seals that are on the valve stem. They are totally useless, so do not replace them. (see pix)
9. Clean springs and retainers.
10. The recommended umbrella valve guide oil seal is Felpro 70373 (see pix)
11. With the cylinder pressurized, remove the retainer wire. Install the new umbrella seal over the valve stem and push down to cover the valve guide. Do not be concerned that the seal will go up and down on the valve stem. The umbrella effect will keep the oil from running down the guide and into the intake valve or thru the exhaust valve.
12. Spring installation. Take the outer valve spring and retainer plate and place in the spring compressor and engage the arms and hook to the spring. Then rotate the outer spring until it threads itself into the spring compressor as far as it will turn. You should have the all but one turn of the spring not in the compressor. Insert the inner spring and rotate and thread into the outer spring as far as it will go. About 3/8” of the spring will extend beyond the end of the outer spring. (see pix)
13. Place the entire assembly over the valve guide. Then compress down on the compressor tool until the upper part of the valve stem is exposed. Then place the valve retainers in the opening and release the pressure. This is difficult and finicky procedure as the retainers are very small and you have to get them inside a small area of the compressor jaws with fat fingers. Be prepared to loose at least two of them. New ones cost $5.00 each
14. Once they are in place, release the pressure from the top of the compressor and unscrew tension on the spring. Once this is done it is easy to remove the compressor tool and you are finished with one valve..
15. Seven more to go.
16. Re-install the rocker shaft, re-set the rocker arm clearance to specification.
17. Replace valve cover and spark plugs, hook up plug wiring and fire up the engine.
This is a lot of work and it took me and an associate about 4 hrs to do. We did discover several little tricks which we have shared with the readers. Would I do this again as opposed to pulling the head on a TF, You Betcha! Yes it’s a PITA, but it does get rid of the “blue smoke”. TF 6688 with 46,000 miles on the odometer showed very little wear in the valve train. Nothing that would make me want to rebuild it.
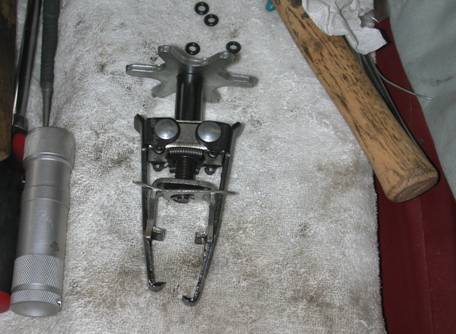
Valve Spring Compressor KD 2078

Box of umbrella seals. Felpro SS 70373
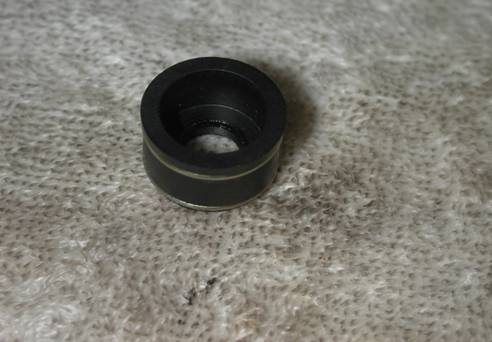
The umbrella type valve guide seal
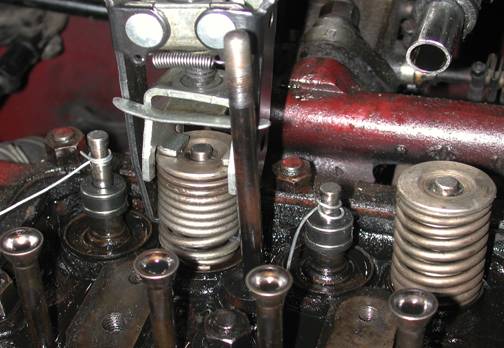
Valve spring under compression with keepers removed.
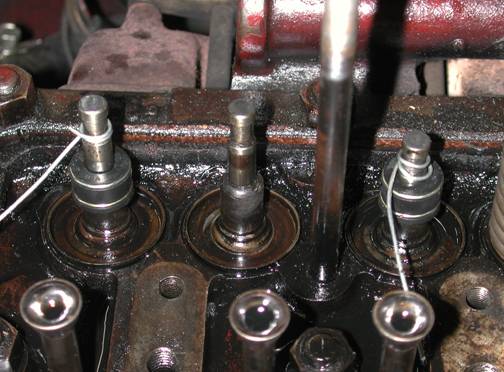
New seals installed. Wire wrap to hold valve. Valve guide exposed center.
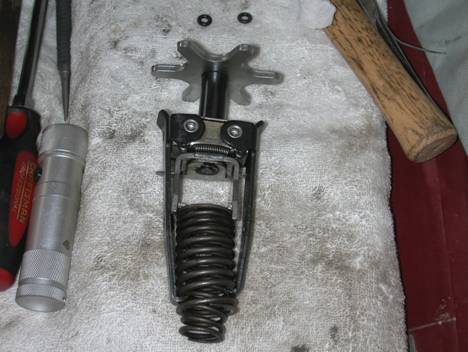
Valve springs inserted into the compressor, before compression.
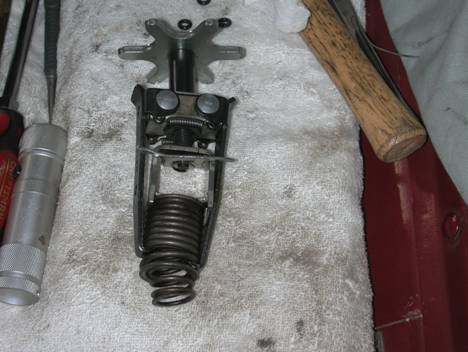
Valve springs compressed for installation on valve stem
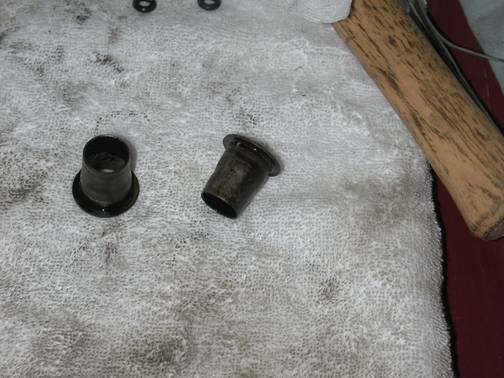
Original oil deflectors......discard
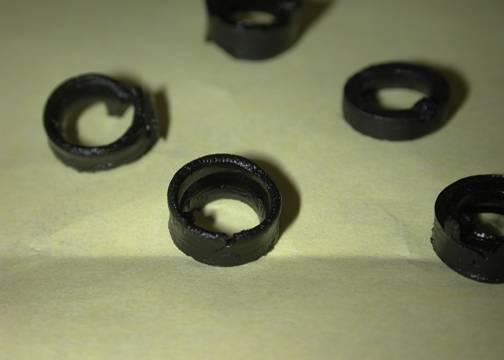
Remains of the original rubber seals. Discard. Note: Not O-Rings but sleeves
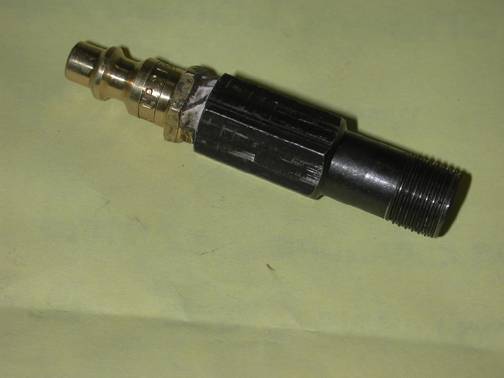
Spark plug hole adapter to pressurize cylinder @ 90 psi.
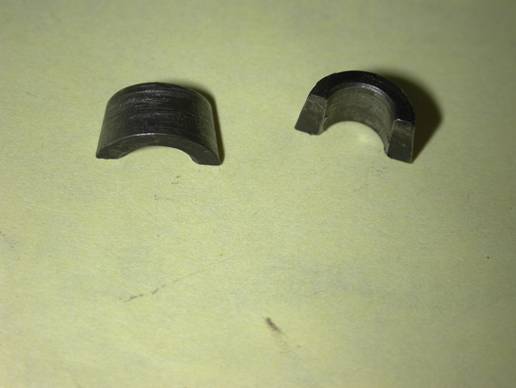
Valve retainers.....aka keepers
Copyright Colin M. Stafford 2008

email to:Bud@Ttalk.info